In this post I want to introduce KVM - Linux's native approach to virtualization. There are many different tools available for building production-grade labs or datacenters and private clouds. The tooling, services and support will vary depending on whether the product targets enterprise, small business or open source.
Some other examples of hypervisors or virtual machine software include: Microsoft hyperV, VMWare vSphere/ESXi, bhyve (on FreeNAS/BSD) and hyperkit from Docker (based upon bhyve).
This post is going to focus on how to create a cluster of Virtual Machines (VMs) using KVM at home in the interests of promoting learning and exploration. We'll setup two KVM VMs with Ubuntu Linux, then install Kubernetes and launch OpenFaaS on top of Kubernetes.
Introduction
KVM is a hypervisor for Linux, it's not to be confused with a multiplexer for keyboard, video and mouse by the same name. As a Docker Captain and open-source developer I spend time a lot of time working with containers on a day-to-day basis. Sometimes I provision VMs in "the cloud" by clicking a few buttons in a UI or invoking a remote API - but am rarely concerned with the finer grain details such as which hypervisor is being used.
![]()
In this post we're going to create our own VMs, here's what we need, for our VM host:
- Virtualization-capable host
- Ubuntu Linux 16.04 LTS installed
- Ethernet connection
- 8-16GB of RAM
- 100-500GB free space (recommended)
Ubuntu 17.10 can run KVM but the networking configured has been changed and now uses netplan. The easiest way to follow the guide is to install or use 16.04 on your host
The tutorial
This tutorial is split into four parts:
- Configure the host for KVM
- Create 2x VMs
- Install Kubernetes & deploy an application
- A quick review
1.0 Install kvm CLI components
$ sudo apt-get install -qy \
  qemu-kvm libvirt-bin virtinst bridge-utils cpu-checker
Check that kvm can run with kvm-ok - this checks for a new device at /dev/kvm.
$ kvm-ok
INFO: /dev/kvm exists
KVM acceleration can be used
1.1 Host networking
By default KVM will utilize NAT for networking on your hosts - this means they get outgoing Internet access, but cannot be accessed easily from the rest of your network. Since we are creating a cluster where we want to access services we need to change the networking over to bridged.
If you've used VirtualBox or VMWare Fusion you may already be familiar with the terms bridged and NAT for VM networking. Bridged networking lets the VM act as if it were plugged in directly to your network and it will get a DHCP IP address from your router.
I'm assuming that you have a home network with a consumer-grade router and that you're working on the 192.168.0.0/24 subnet. Change the IPs where necessary if you're not.
- Now set up a bridge interface on the host
Replace eno1 with the name of your Ethernet adapter as shown on ifconfig.
/etc/network/interfaces
# The primary network interface
#auto eno1
#iface eno1 inet dhcp

auto br0
iface br0 inet dhcp
        bridge_ports eno1
        bridge_stp off
        bridge_fd 0
        bridge_maxwait 0
Here I've set a dynamic IP for the KVM host, but you could also set a static IP address. The key part is to comment out the auto eno1 lines and add the br0 lines which define the bridge adapter.
- Set up IP forwarding and bridge configuration:
Edit /etc/sysctl.conf and add:
net.bridge.bridge-nf-call-ip6tables = 0
net.bridge.bridge-nf-call-iptables = 0
net.bridge.bridge-nf-call-arptables = 0
net.ipv4.ip_forward = 1
Now restart the machine.
You should now see a device br0 on ifconfig - it will have an IP address but eno1 will not show one.
1.2 CLIs
As part of the installation you'll see two of the new CLIs added:
virsh- used for administrating, creating and inspecting VMs using libvirtvirt-install- used to bootstrap/install a new VM
virsh has all sorts of handy commands and can act as a shell itself. The most useful command is virsh list --all which shows you any running or stopped VMs.
- Boot a VM -
virsh start <vm> - Stop a VM -
virsh shutdown <vm> - Suspend a VM -
virsh suspend <vm> - Delete a VM -
virsh destroy <vm>andvirsh undefine <vm>
A CLI reference guide for virsh is available here.
2.0 Create your first VM
We'll create an Ubuntu VM now using virt-installer. No VNC or remote desktop tooling is required as this runs over a terminal session.
This will install Ubuntu Linux over the Internet which means we do not need to fetch an ISO image ahead of time. If you do want to do an offline installation then you can pass the --cdrom flag instead of --location.
Save create-vm.sh:
#!/bin/sh

if [ -z "$1" ] ;
then
 echo Specify a virtual-machine name.
 exit 1
fi

sudo virt-install \
--name $1 \
--ram 4096 \
--disk path=/var/lib/libvirt/images/$1.img,size=30 \
--vcpus 2 \
--os-type linux \
--os-variant ubuntu16.04 \
--network bridge:br0,model=virtio \
--graphics none \
--console pty,target_type=serial \
--location 'http://gb.archive.ubuntu.com/ubuntu/dists/xenial/main/installer-amd64/' \
--extra-args 'console=ttyS0,115200n8 serial'
You can adjust any of the parameters here such as the ram or vcpus. You can also target a different path for the disk such as an NFS mount-point if you have a NAS or external drive. The size=30 parameter to --disk specifies Gigabytes.
The server edition of Ubuntu Xenial will be picked up from the --location flag.
I like to run tmux at this point so that I can disconnect from the installer and come back later, or run multiple installations at the same time.
Make the script runnable and then run it passing in the machine-name as an argument:
$ chmod +x create-vm.sh

$ ./create-vm.sh k8s-master
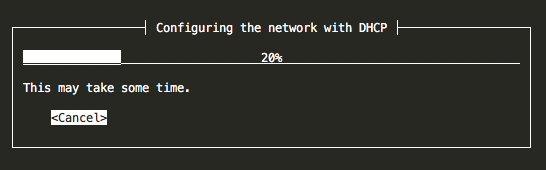
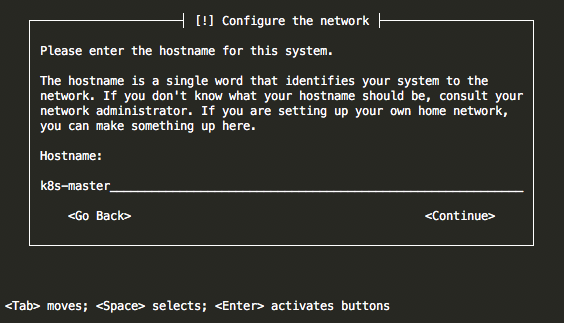
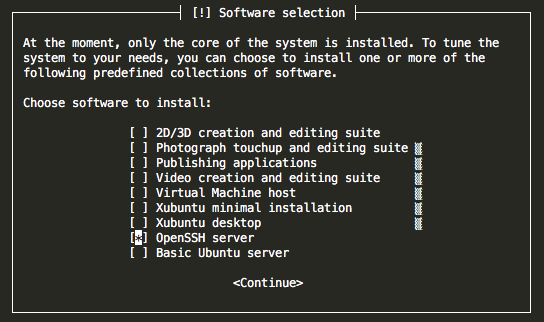
Now follow all the instructions for the Ubuntu command-line installer.
- You should see the VM get a network address
- Set the hostname to k8s-master
- Call your user-account
ubuntu

- Select the OpenSSH server package (important)
- Let it reboot at the end of the installer
Now use nmap to scan your network for new IP addresses:
sudo nmap -sP 192.168.0.0/24
Note:
sudois required here, do not ommit it.
You should see a new entry appear with a manufacturer of QEMU virtual NIC:
Nmap scan report for 192.168.0.66
Host is up (0.00049s latency).
MAC Address: 52:54:00:07:79:AF (QEMU virtual NIC)
Use that IP address and log in with ssh and the user you created during the installation:
$ ssh ubuntu@192.168.0.66

Welcome to Ubuntu 17.10.1 LTS (GNU/Linux 4.4.0-112-generic x86_64)

 * Documentation:  https://help.ubuntu.com
 * Management:     https://landscape.canonical.com
 * Support:        https://ubuntu.com/advantage
Last login: Fri Feb  9 21:39:27 2018 from 192.168.0.22

ubuntu@k8s-master:~$
- Kubernetes requires that we turn swap space off.
Edit /etc/fstab:
# swap was on /dev/vda5 during installation
# UUID=a5f1c243-37a7-440c-88e0-d0fe71f05ce7 none            swap    sw              0       0
Comment out the line that says swap as above, now to save a reboot type in sudo swapoff -a
- Optional step - set a static IP
You can optionally set a static IP address for the VM by editing /etc/network/interfaces. Make sure the IP you set matches the subnet for your home network.
If you are using the IP range 192.168.0.0/24 then pick an IP address that is unlikely to be allocated to another device on your network such as 192.168.0.200 / 201 etc.
- Add any additional packages you may want
Depending on which packages you selected you may also want to install the git and curl packages via apt install.
That's it - we now have our first virtual machine with its own IP address on our network.
2.1 Create the next machine
The name of the machine and the disk image should be unique each time you run this. Here we set that via --name and --disk.
Now run the provisioning script we created above with a new hostname such as k8s-1 or k8s-2 etc:
$ ./create-vm.sh k8s-1
Run through the installer the same way as we did in 2.0 and then find the IP address and make sure the machine has come up. Make sure you also run sudo swapoff -a and edit /etc/fstab - do not skip any instructions.
3.0 Install Kubernetes components
You now have two options - you can follow my "Instant guide" or if you're experienced with kubeadm you can use the shell steps I list below.
![]()
- The guide:
We'll now install Kubernetes with my guide: Your instant Kubernetes cluster.
You will need to ssh into the master for the kubeadm init step and the worker for the kubeadm join step.
- The fast way (if you're experienecd with Kubernetes):
Run the Gist to install the components
$ curl -sL https://gist.githubusercontent.com/alexellis/e8bbec45c75ea38da5547746c0ca4b0c/raw/23fc4cd13910eac646b13c4f8812bab3eeebab4c/configure.sh | sudo sh
- Initialize the master
Refer to the Kubernetes guide for how to log into the master and run sudo kubeadm init:
$ ubuntu@k8s-master:~$ sudo kubeadm init
Now apply Weaveworks networking:
$ kubectl apply -f "https://cloud.weave.works/k8s/net?k8s-version=$(kubectl version | base64 | tr -d '\n')"
- Join the first worker node
Log into the worker and join it into the cluster with sudo kubeadm join
Note: for more details on the Kubernetes configuration please read the guide linked above.
3.1 Deploy an application
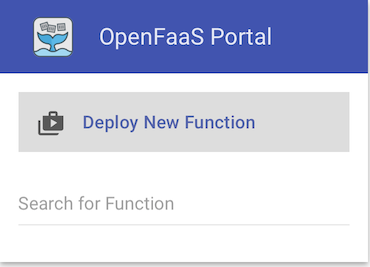
We can now deploy an application - let's deploy OpenFaaS - Serverless Functions Made Simple. It has a built-in UI dashboard and is easy to use.
![]()
On the master:
$ apt install git
$ git clone https://github.com/openfaas/faas-netes && cd faas-netes \
  && kubectl apply -f namespaces.yml,./yaml
Now we can watch the services come up as they are pulled from the Docker Hub and scheduled on the worker node:
$ watch 'kubectl get pods --all-namespaces'
You're watching out for this on each line:
READY     STATUS    RESTARTS
1/1       Running   0
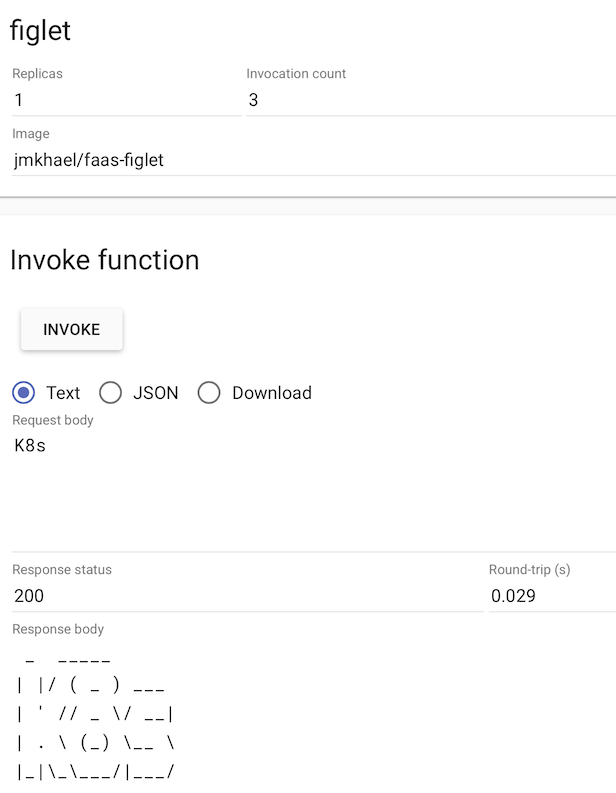
You can now deploy a function from the OpenFaaS Function Store and try it out in the browser. Just open the IP address of the k8s-master node with port 31112:
- Click the Function Store icon:
- Pick the Figlet function:
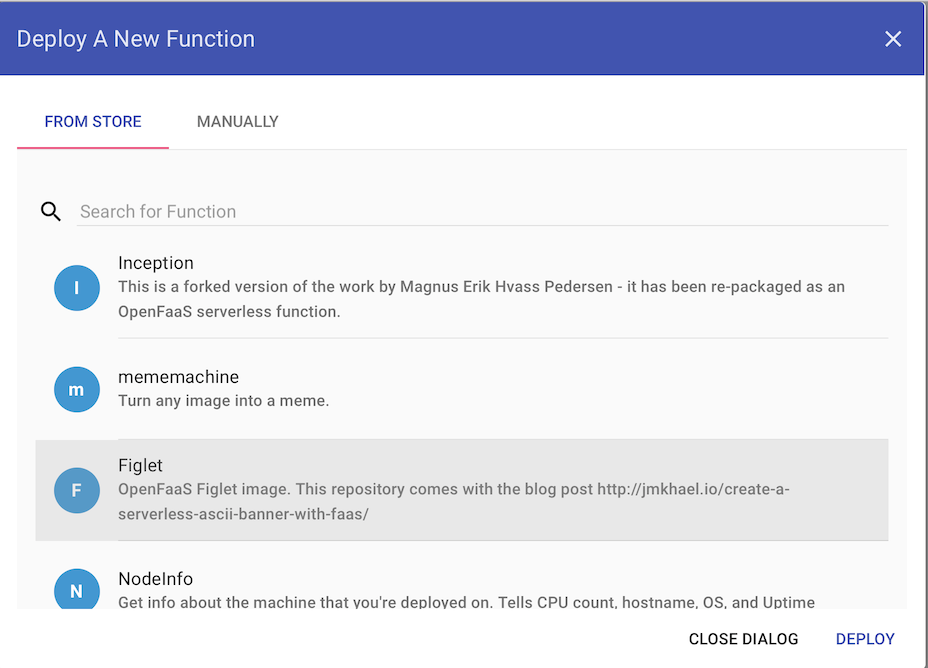
- Now type in some text in the Request body and hit Invoke to see a
figletASCII logo generated:
4.0 Recap and caveats
So to recap we did the following:
- Installed KVM and CLI tooling
- Created a bridge interface to allow VMs to get IP addresses from our router
- Installed two VMs with Ubuntu
- Created a Kubernetes cluster with
kubeadm - Deployed an application - OpenFaaS
- Run a Serverless Function
This is just scratching the surface of KVM - there's much more you can do and you can of course install other Operating Systems like CentOS, SuSE Linux and even Windows.
Here's a couple of caveats:
- We used a dynamic IP on the master and worker
When you restart those VMs or power them up next time they'll get a brand new IP address - that will mean you have to run kubeadm again on both nodes. The alternative is to set a static IP address on both nodes.
- We used an installer
You may be wondering why we did not just clone the first VM as a sort of template. In practice I found that even after changing the machine-id, hostname, ssh host keys etc - Kubernetes did not work right on a cloned machine. Your mileage may vary. There is also a specialist tool for "scrubbing" a cloned Linux VM called virt-sysprep - I found even this tool caused issues.
- There are other ways to manage KVM VMs
You can manage KVMs via a UI and this is a popular option - especially if you're used to driving a tool at work like vSphere/vCenter from VMWare.
Ubuntu offers a graphical tool called virt-manager which gives you an experience similar to the UI in Oracle VirtualBox.

We're running a lean, headless server so I didn't want to install X11 and or VNC.
Kimchi is a web UI which may be a good compromise between connecting a monitor, installing X11/VNC.

- Will this run on a Raspberry Pi?
I suspect this may be possible, but I don't know and would never recommend doing virtualization on such a low powered device. To create a multi-node RPi cluster see the links below.
Wrapping up
In this blog post I set out to show you how to create and run a Kubernetes cluster on a single host and deploy an application. There are many ways to run Virtual Machines in your home-lab ranging from commercial solutions from VMware to built-in virtualization on Linux with KVM.
If you need a cluster fast then public cloud is hard to beat - but for those of you who like to know how things work and to tinker with CLIs I hope this has been a good primer for KVM. Go and experiment and let me know what you've learnt on the blog comments or via Twitter @alexellisuk.
Get started with KVM & Kubernetes - great if you want to use VMs at home or build a lab. https://t.co/1sSNrfx0Xl pic.twitter.com/bmYpt5ZHKB
— Alex Ellis (@alexellisuk) February 10, 2018
Enjoyed the tutorial? 🤓💻
Follow me on Twitter @alexellisuk to keep up to date with new content. Feel free to reach out if you have any questions, comments, suggestions.
Hire me to help you with Kubernetes / Cloud Native
Hire me via OpenFaaS Ltd by emailing sales@openfaas.com, or through my work calendar.