faasd - lightweight Serverless for your Raspberry Pi
Kick the tires with faasd today, for a lightweight serverless experience that doesn't require Kubernetes. Instead it uses containerd and the existing OpenFaaS ecosystem.
Last updated: 24th October 2020 - upgraded faasd & containerd versions. Added instructions for core components logs such as the gateway.
You can run faasd anywhere, even on a Raspberry Pi, but why would you want to do that? faasd offers many of the benefits of containers and OpenFaaS, but without the complexity and operational costs of Kubernetes. containerd is a low-level tool for automating containers, and a CNCF project.

The use-cases for Serverless / FaaS are fairly well-known, but you could use faasd at the edge, in a smart-car, as part of an IoT device, for crunching data before uploading samples to the cloud, for webhook receivers/alerting, bots, webservices, API integrations or even providing your own APIs. Compute is compute, and OpenFaaS with containerd makes it easy to both consume and provide.
🚀 Support the development of faasd - Sponsor OpenFaaS on GitHub ⭐️ Star or fork faasd on GitHub
Before we start
Use Raspbian Lite (now called RaspiOS) for this tutorial. Do not install Docker on the same Raspberry Pi as it may cause conflicts with networking and the version of containerd we are using.
You should use RPi 2, 3 or 4. If you have only one Raspberry Pi, then you'll be able to deploy pre-built images from the OpenFaaS Function Store, but if you have a second Raspberry Pi, then you can use it to build new functions too.
You can also deploy to a PC or cloud VM:
Part 1 - Installation
Installation only takes a few moments, and in the future should be quicker if we can secure binaries for containerd from the upstream project.
Since this guide was written, we introduced an automated script to set up faasd. You should probably use that instead, and then skip down to the walk-through / tutorial segment of the post.
So here's the easy way for you:
git clone https://github.com/openfaas/faasd
cd faasd
./hack/install.sh
To do things the hard way (I know some of you prefer this option), then continue as per below.
Get faas-cli
The faas-cli can be used to build, deploy, manage, and invoke functions with OpenFaaS. OpenFaaS offers a REST API, asynchronous invocations, authentication, metrics, and a UI out of the box.
Install using the utility script, or alternatively the binaries are also available on the releases page.
# Install to local directory
curl -sLfS https://cli.openfaas.com | sh
sudo mv faas-cli to /usr/local/bin

# Or run with sudo to move to /usr/local/bin in one step
curl -sLfS https://cli.openfaas.com | sudo sh
See also: OpenFaaS docs
Get containerd
Unfortunately the containerd maintainers only provide binaries for x86_64 (regular PCs), so we have to install Go and build containerd from source.
We'll install some dependencies that will help us in the tutorial and after installation
sudo apt update \
  && sudo apt install -qy \
    runc \
    bridge-utils \
    tmux \
    git
Pick option A or B.
A) Use my containerd armhf binaries (fast)
I have compiled binaries for containerd, which you can use if you wish. alexellis/containerd/armhf.
curl -sSL https://github.com/alexellis/containerd-arm/releases/download/v1.3.5/containerd-1.3.5-linux-armhf.tar.gz | sudo tar -xvz --strip-components=1 -C /usr/local/bin/
B) Build your own containerd binaries (slow)
Raspbian needs a few additional build-time dependencies for containerd:
sudo apt update \
  && sudo apt install -qy \
    build-essential \
    libbtrfs-dev \
    libseccomp-dev
You can use my utility script to build containerd now:
export GOPATH=$HOME/go/
mkdir $GOPATH/src/github.com/openfaas
cd $GOPATH/src/github.com/openfaas
git clone https://github.com/openfaas/faasd

cd cd faasd

./hack/build-containerd-armhf.sh
This could take a few moments on RPi2 or 3, and is a little quicker on RPi4.
Configure containerd to start on boot
Install a systemd unit file for containerd:
curl -SLfs https://raw.githubusercontent.com/containerd/containerd/v1.3.5/containerd.service | sudo tee /etc/systemd/system/containerd.service

sudo systemctl enable containerd
sudo systemctl start containerd
Check that containerd started with sudo systemctl status containerd, if not then you may need to unmask it and run the commands again. See unmasking a service.
Install networking
-
Enable the Kernel's bridge module
# One-off sudo modprobe br_netfilter && \ sudo sysctl net.bridge.bridge-nf-call-iptables=1 # Make it permanent echo "br_netfilter" | sudo tee -a /etc/modules-load.d/modules.conf echo "net.bridge.bridge-nf-call-iptables=1" | sudo tee -a /etc/sysctl.conf -
Install CNI plugins
Fortunately there are upstream ARM binaries available for the CNI plugins.
sudo mkdir -p /opt/cni/bin curl -sSL https://github.com/containernetworking/plugins/releases/download/v0.8.5/cni-plugins-linux-arm-v0.8.5.tgz | sudo tar -xz -C /opt/cni/bin -
Enable NAT
Enable NAT between the container network and your wider network and the Internet:
sudo /sbin/sysctl -w net.ipv4.conf.all.forwarding=1

echo "net.ipv4.conf.all.forwarding=1" | sudo tee -a /etc/sysctl.conf
Optional step - if you have Docker running on your system, then disable it and reboot at this point.
sudo systemctl disable docker
sudo systemctl disable docker.sock # or docker.socket - You may also need this step
Docker's IP address range conflicts with the one chosen by netns, this will be resolved when moving to CNI.
Get faasd
faasd is a Go binary that runs on your system and packages all of OpenFaaS, it's a similar tool to docker-compose.
One of faasd's commands faasd provider runs an OpenFaaS provider which implements the OpenFaaS "CRUD" API for functions.
Clean-up old versions, if required:
# Stop systemd services, if you have them
sudo systemctl stop faasd
sudo systemctl stop faasd-provider

# Remove old binaries if you have them
sudo rm -rf /usr/local/bin/faasd
Download the faasd binary:
sudo curl -sSLf "https://github.com/openfaas/faasd/releases/download/0.9.9/faasd-armhf" \
    --output "/usr/local/bin/faasd" \
    && sudo chmod a+x "/usr/local/bin/faasd"
Now run the installation:
export GOPATH=$HOME/go/
mkdir -p $GOPATH/src/github.com/openfaas
cd $GOPATH/src/github.com/openfaas

git clone https://github.com/openfaas/faasd --depth=1

cd faasd

sudo faasd install
Part 2 - Post-installation
The faasd install command creates two systemd unit files which can be used to start/stop faasd and faasd-provider.
Check the installation
Check the services:
sudo systemctl status faasd
sudo systemctl status faasd-provider
Find logs:
sudo journalctl -u faasd --lines 40
sudo journalctl -u faasd-provider --lines 40
You'll find your login details for the gateway in /var/lib/faasd/secrets, the user is admin and the password is in /var/lib/faasd/secrets/basic-auth-password
Check the logs from the OpenFaaS Core Services
You can access the logs from any of the core services deployed with faasd as follows:
sudo journalctl -t default:gateway --lines 40
sudo journalctl -t default:nats --lines 40
sudo journalctl -t default:queue-worker --lines 40
sudo journalctl -t default:prometheus --lines 40
For more, see the docker-compose.yaml file in the current directory.
Access OpenFaaS from your laptop
faasd deploys OpenFaaS along with its core logic faasd-provider, which uses containerd instead of Kubernetes to start, stop, and manage functions.
The faasd process will proxy any incoming requests on HTTP port 8080 to the OpenFaaS gateway container, you can also find the IP of the container in your hosts file in the faasd directory.
You can also access the built-in Prometheus container by editing docker-compose.yaml to expose its ports, either to 127.0.0.1, or all your network adapters.
Deploy a function from the store
Obtain your OpenFaaS password. You need to run this command on your Raspberry Pi:
sudo cat /var/lib/faasd/secrets/basic-auth-password
Log in to the gateway, either on your RPi, or from your own computer.
# If connecting remotely
export IP=192.168.0.101
export OPENFAAS_URL=http://$IP:8080
echo $PASSWORD | faas-cli login

# Or on device:

sudo cat /var/lib/faasd/secrets/basic-auth-password | faas-cli login --password-stdin
Look at what's available in the function store for the armhf platform, then deploy something:
faas-cli store list --platform armhf

# Deploy figlet
faas-cli store deploy --platform armhf figlet

# Find the URLs for the function
faas-cli store inspect figlet

# Create some ASCII

echo "faasd" | faas-cli invoke figlet
Try a function that can generate an identicon like you may have seen for default avatar logos on GitHub.com
faas-cli store deploy --platform armhf identicon

echo $USER | faas-cli invoke identicon > avatar.png
Here's an example of the avatar for the user pi:
![]()
Run an async function
You can also run your functions in the background or asynchronously.
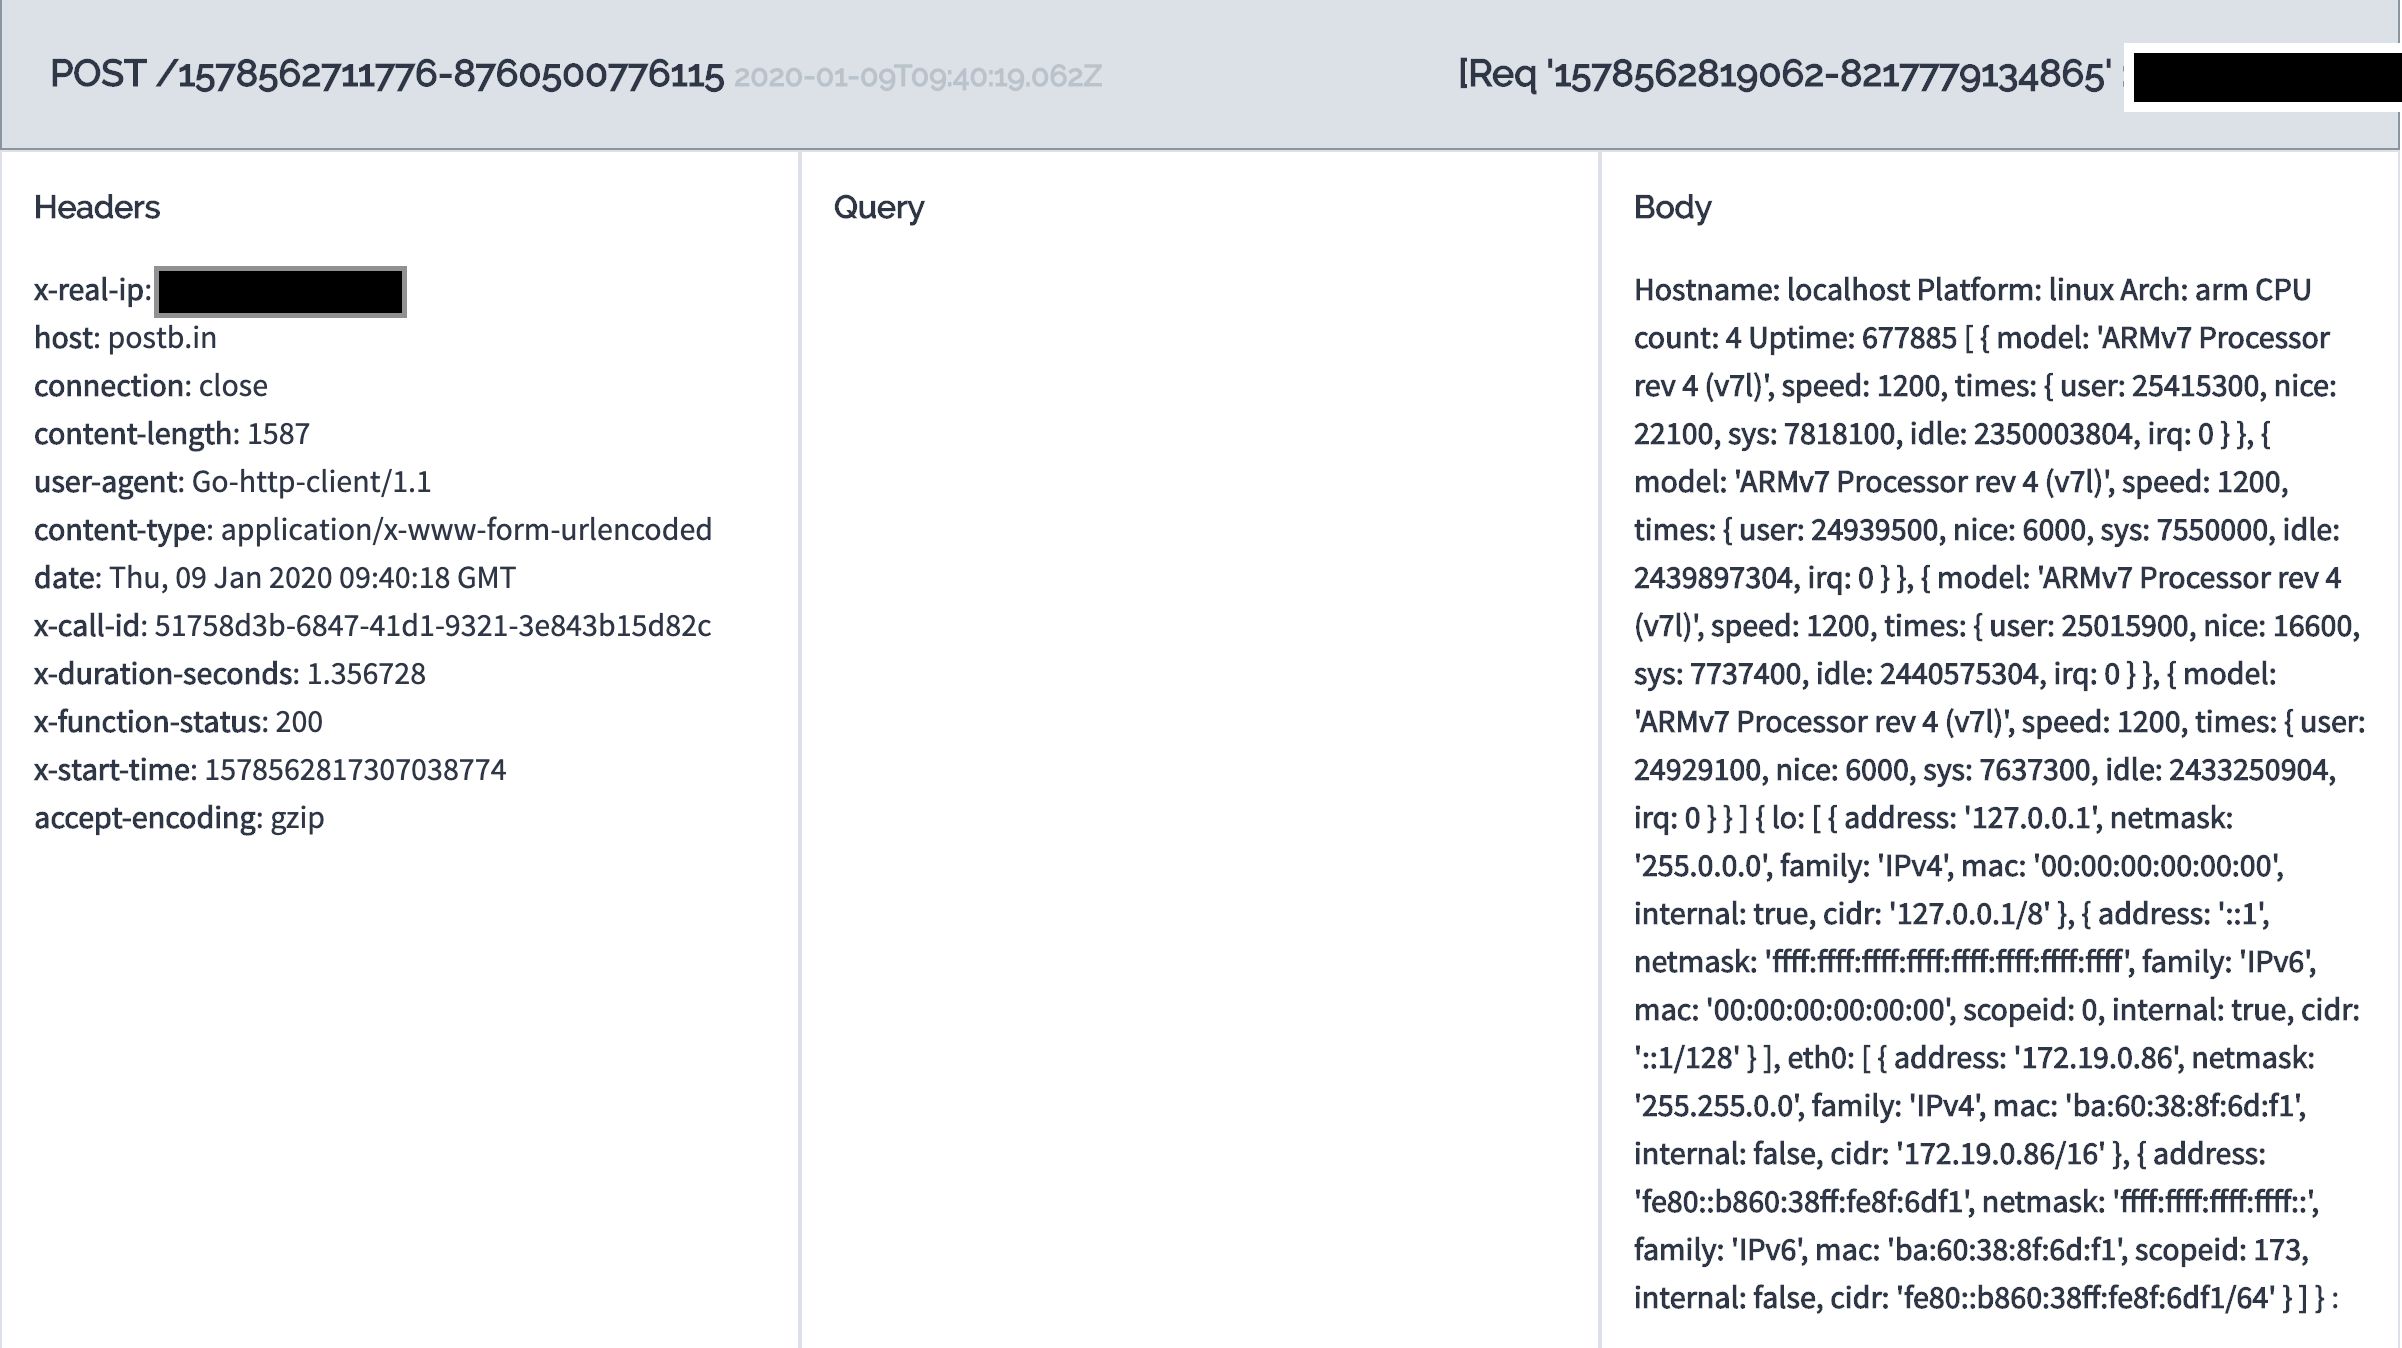
Create a webhook receiver using a public service such as:
faas-cli store deploy --platform armhf nodeinfo

curl -d "verbose" \
  http://127.0.0.1:8080/async-function/nodeinfo \
  --header "X-Callback-Url: https://postb.in/1578562711776-8760500776115"
You'll be able to refresh your webhook receiver and see the value.
Cross-compile a new container image
The easiest way to build an image is on your PC, using cross-compilation or QEMU and the faas-cli publish function:
faas-cli new --lang go go-fn --prefix alexellis2
faas-cli publish -f go-fn.yml --platform linux/arm/v7

# Or publish an image that you can also deploy to OpenFaaS on an x86_64 machine:

faas-cli publish -f go-fn.yml --platform linux/arm/v7,linux/amd64
Once you have published an image, you can deploy it from the PC to faasd with:
faas-cli deploy -f go-fn.yml --gateway http://pi-address:8080
Build a new container image on a Raspberry Pi
You cannot install Docker on your Raspberry Pi running faasd because it will cause a conflict with containerd and our CNI networking.
Building on your server is not a recommended practice, so flash an SD card for a second Raspberry Pi.
You can also use one of my prebuilt functions such as ascii-2020, but you should only run the faas-cli deploy step.
-
Log into the Raspberry Pi with
sshand install thefaas-clianddocker.curl -sLfS https://cli.openfaas.com | sudo shcurl -sLfS https://get.docker.com | sudo sh sudo usermod -aG docker pi newgrp -
Log into the Docker Hub
docker login -
Create a Golang function
export DOCKER_HUB_NAME="alexellis2" faas-cli template store pull golang-middleware faas-cli new --lang golang-middleware \ hello-world \ --prefix $DOCKER_HUB_NAME -
Now publish an image:
faas-cli publish -f hello-world.yml --platform linux/arm/v7
Note that the faas-cli build / up commands do not work with multi-arch templates, which is why we have separated out the commands for you.
Deploy your new container
You can set your OpenFaaS gateway to point at the RPi where faasd is running.
export OPENFAAS_URL=http://$RPI_IP:8080

faas-cli deploy
Your new function will be pulled down on the first Raspberry Pi and start executing. Find the IP address / URL for invoking the function, both synchronous and asynchronous invocations are working:
faas-cli describe -f hello-world.yml hello-world
Now, try editing your function's source-code in hello-world/handler.go - get it to print a different message perhaps? The template we have chosen runs validation with gofmt, so if you've edited on the RPi, you may want to format the text before doing a build.
Using private Docker registries
Private registries are supported such as the Docker Hub, AWS ECR, GitLab, or your own private hosted registry.
As an advanced topic, this is covered in my eBook Serverless For Everyone Else, the official handbook for faasd.
Note: If you want to setup your own registry, follow my 5 minute tutorial with k3sup.
Logs
You can access the logs of your functions and microservices via:
faas-cli logs NAME
faas-cli logs NAME --follow
Get a public IP and TLS for faasd
Inlets can help us to get a public IP and ingress to our functions, this is done through a tunnel to a host on a cloud IaaS or VPS provider such as DigitalOcean.
Download inlets PRO - "The Cloud Native Tunnel", it will act as a tunnel and a reverse proxy.
curl -sSLf https://inletsctl.inlets.dev | sudo sh

# Download the inlets PRO client

inletsctl download --pro
You'll need an access token for a cloud for one of the supported providers, see the list on: inletsctl create --help. You can also create your hosts manually and install inlets yourself.
I picked DigitalOcean and ran the create command to provision the exit server, this is the public-facing host with a public IP.
Note: the host we create will cost around 5 USD / mo, for as long as you keep it running, you can run
inletsctl deleteat any point, or remove the VM from your dashboard. You can run an exit-node for free with some cloud providers who offer a free tier, or credits.
inletsctl create \
  --provider digitalocean \
  --access-token-file $HOME/do-token \
  --license-file $HOME/.inlets/LICENSE
Note: you can get a free 14-day trial for inlets PRO to try it out, or purchase a license for personal use at a discounted rate: inlets website
After a few seconds the host will boot-up, download inlets and run inlets server in a systemd unit file. You can then run the inlets client on your RPi.
The inletsctl create command will print out a sample connection string. Just edit the UPSTREAM and PORTS variables so that they point to the OpenFaaS gateway:
  export PORTS=8080
  export UPSTREAM=127.0.0.1
  inlets-pro client --remote "wss://178.128.40.222:8080" \
        --token "525ed828fdfe11897b26b8a0d5359ef6c7ddd4ad" \
        --upstream $UPSTREAM \
        --tcp-ports $PORTS
The
wss://prefix shows that the tunnel is encrypted
Your functions can now be accessed via the public Internet, feel free to share the URL with your friends.
To access the UI and API of OpenFaaS you will need to use the Basic authentication credentials. By default, all functions are "open" without authentication.
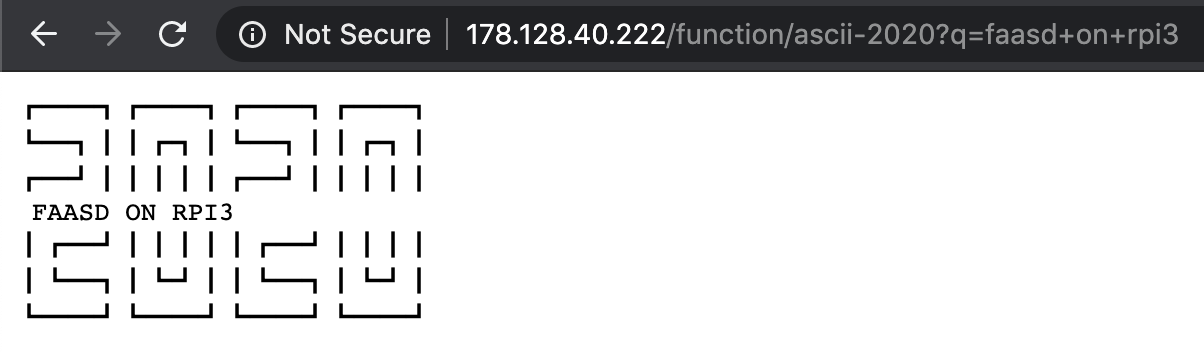
In my example I have a function running called ascii-2020 from this repo.
From anywhere in the world users can invoke the function:
http://178.128.40.222:8080/function/ascii-2020?q=faasd+on+rpi3
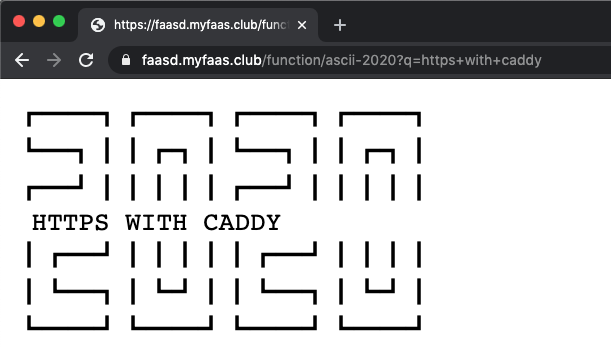
Get TLS and a custom domain
You can get a TLS certificate for your tunnel, and custom domains by following the instructions in my eBook - Serverless For Everyone Else.
Make it permanent
To make inlets recreate the tunnel upon boot-up, just create a systemd unit file by adding the --generate=systemd flag to inlets-pro client
Notes on rebooting/restarting faasd
Now try rebooting your RPi, you should see that the gateway comes up again afterwards. The functions that you have deployed will still be present, but scaled to zero, so the first invocation will warm them back up again, this process can take around 0.38 seconds. On a PC, this is even faster.
If you ever need to remove a function manually, you can do it like this:
export FN="figlet"
sudo ctr --namespace openfaas-fn task delete -f $FN
sudo ctr --namespace openfaas-fn container delete $FN
sudo ctr --namespace openfaas-fn snapshot remove $FN-snapshot
Wrapping up
faasd brings a lightweight experience to your Raspberry Pi, cloud infrastructure and to bare metal, all without the need for Kubernetes. The solution is still under active development, so you may not want to put it out in production just yet, but we're moving fast and already have async invocations, authentication, and function store support.
If you felt like the installation process was somewhat verbose, then don't worry: we also have an installation script, which you can also use.
This RPi3 has 1GB RAM and 4 cores. Right now it's running @openfaas @nats_io @PrometheusIO @inletsdev @containerd but there's no Kubernetes in sight. That means we have room left for some functions 🤓 https://t.co/WW5TZVdAeU pic.twitter.com/JYeV1nSToK
— Alex Ellis (@alexellisuk) January 8, 2020
What can you run?
You may be wondering what to run on your new RPi with faasd. Almost any code should be able to run as long as it conforms to the workloads definition. It could be an API, a blog, a function, a microservice, a CLI invoked by our watchdog, or a simple webpage.
You can also invoke functions using the various openfaas event connectors and triggers.
Checkout the official handbook - "Serverless For Everyone Else"
I wrote an official handbook for faasd covering the basics and much more more. It's a great way to start and you can use it at home or at work. You can get the eBook on its own, or a video workshop with it.
You'll learn how to build functions with Node.js - use configuration, add NPM modules, make HTTP calls, enable authentication, connect to Postgresql and then monitor your functions.
Potential use-cases
Here's a few ideas off the top of my head:
- A Slackbot that can receive webhooks from Slack and respond to users
- A webhook receiver for GitHub to log or track statistics
- A GitHub bot like Derek
- Automation of home servers and IoT devices - use a function to send a call to your smart home?
- Host a website or a blog using the node12 template or React
- Download your favourite videos with the youtubedl function from the store
- Set up cron jobs to execute functions on a regular basis
Try faasd on your favourite cloud, for work
You can use faasd on public cloud for real work too. It's ideal where you have a client project, and don't want to spend a lot of time maintaining and upgrading a Kubernetes cluster.
faasd doesn't need complicated server management or cluster configuration, you can even integrate a CI/CD pipeline using GitLab or GitHub Actions and within in a few minutes you'll have TLS endpoints you can update by pushing code a git repository.
Get involved
-
🚀 Support the development of faasd - Sponsor OpenFaaS on GitHub
-
⭐️ Star or fork faasd on GitHub
-
Join the community on OpenFaaS Slack
-
Read the OpenFaaS docs
For questions, comments, and suggestions ping me on Twitter @alexellisuk