Build a 10 USD Raspberry Pi Tunnel Gateway
In this tutorial I'll show you how to build an Internet Gateway for your home network using a Raspberry Pi and a HTTPS tunnel for just 10 USD.
You can achieve a similar effect of an Internet gateway by enabling port-forwarding on your home router, however there are downsides to this.
- Your customer identifier / location is disclosed to users of your services
- Some ISPs block port 80/443
- Others give you a DHCP IP which changes often
- You might not be able to port-forward, perhaps you're behind Carrier Grade NAT, or on a shared WiFi network, where you're not the administrator - think hot-spot, hotel, or university accomodation
An Internet gateway with the inlets will provide a persistent connection behind the trickiest of networks and let you expose your private and LAN services of choice to the Internet.
Why might you want to get access to a service running on your private network? Perhaps you're running an OwnCloud, Plex, a blog, or some other admin dashboard or panel. Maybe you want to build a Twitter, Slack, or GitHub bot and receive webhooks? These are all valid use-cases and I'm sure there's loads more you can think of.
Last updated on December 2020
These are the parts you'll need:
- Raspberry Pi Zero W - RRP 10 USD


- An SDCard writer, I use Apple's USB-C SD Card writer

- An API access token for public cloud, such as DigitalOcean - feel free to use this referral link to grab a few credits
- inletsctl
You can ⭐️ star or fork inlets on GitHub
Tutorial
I've created a 10 USD Internet gateway using a Raspberry Pi Zero @Raspberry_Pi
— Alex Ellis (@alexellisuk) January 17, 2020
Now I can get access to any private services I want, from a public IP provided by the cloud. Tutorial coming soon.https://t.co/59zQW8poWG pic.twitter.com/1uVrSdKk1z
Flash Raspbian Lite to your SD card
- Download Raspbian Lite, there's no need for a full desktop environment.
- Use Etcher.io to flash the OS image to your SD card.
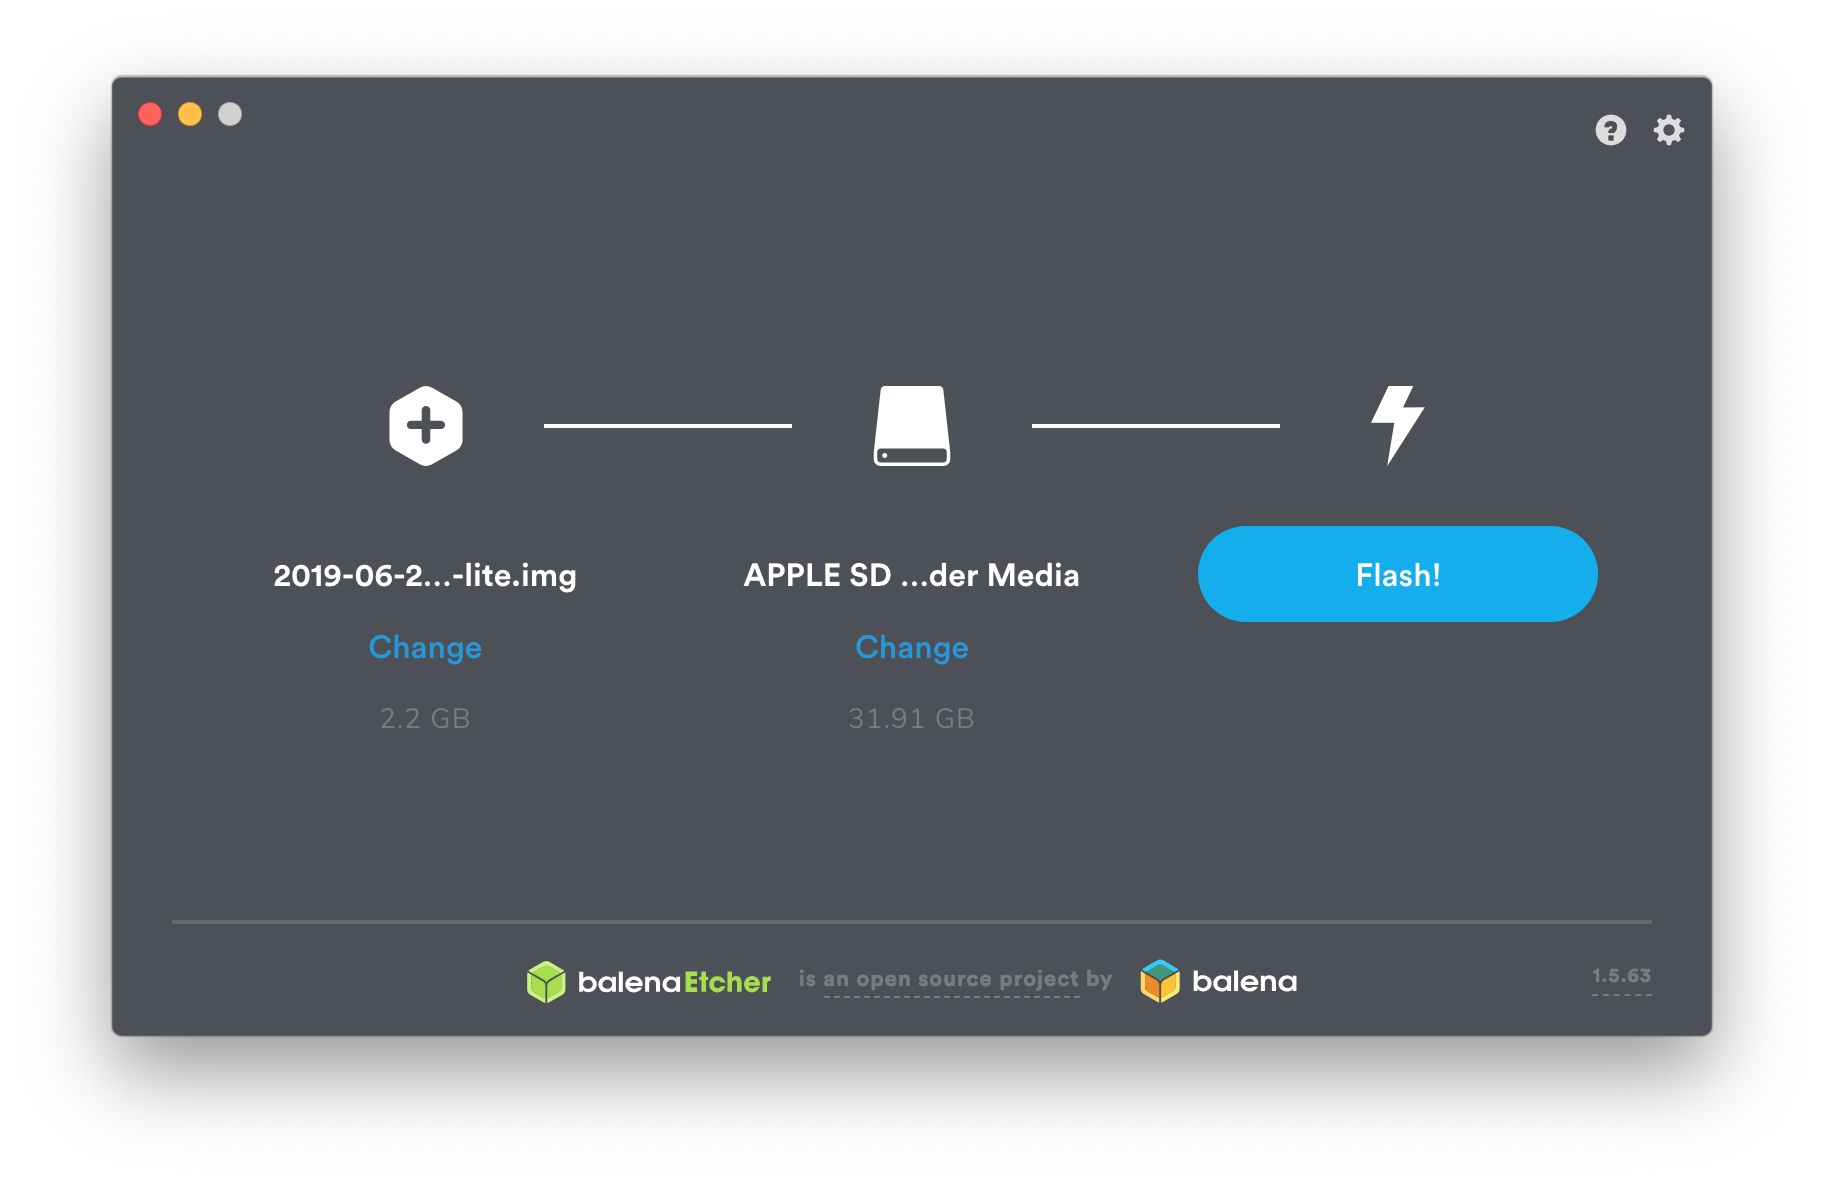
We'll access the RPi headless, via SSH. So before you unmount the SD card, make sure you create a file in the boot partition called ssh.
On MacOS: sudo touch /Volumes/boot/ssh
If you're going to use WiFi for the gateway, then create a wpa_supplicant.conf file in the boot partition too.
country=GB
ctrl_interface=DIR=/var/run/wpa_supplicant GROUP=netdev
update_config=1
network={
    ssid="MySSID"
    psk="mypasswd"
}
Log in for the first time
Now log into the Raspberry Pi via ssh, you should add your ssh key on the device so that you don't need to log in with a password.
Note: the RPi Zero is the slowest version available, so it may take a few mintues for the initial boot, which involves resizing the root partition to fill the SD card.
# Check if you have a key, if not, run `ssh-keygen` and hit enter to everything
ls ~/.ssh/id_rsa.pub

ssh-copy-id pi@raspberrypi.local
Now log in and customise the RPi:
sudo raspi-config
- Change Password. Make sure you set a password other than the default
- Advanced Options -> Memory Split. Set the memory split to 16MB
- Enter Network Otions -> Hostname. Set the hostname to whatever you want, I picked
inlets-gw1
I like to remove the message of the day - sudo rm -rf /etc/motd
Don't reboot yet.
Harden the RPi
Now we'll prevent password logins over SSH, and only allow SSH keys to be used.
sudo nano /etc/ssh/sshd_config
Add a line: PasswordAuthentication no
Now reboot.
Install inlets
inlets is a reverse proxy and a network tunnel that will run on the Raspberry Pi and act as a gateway / router for any services we wish to expose.
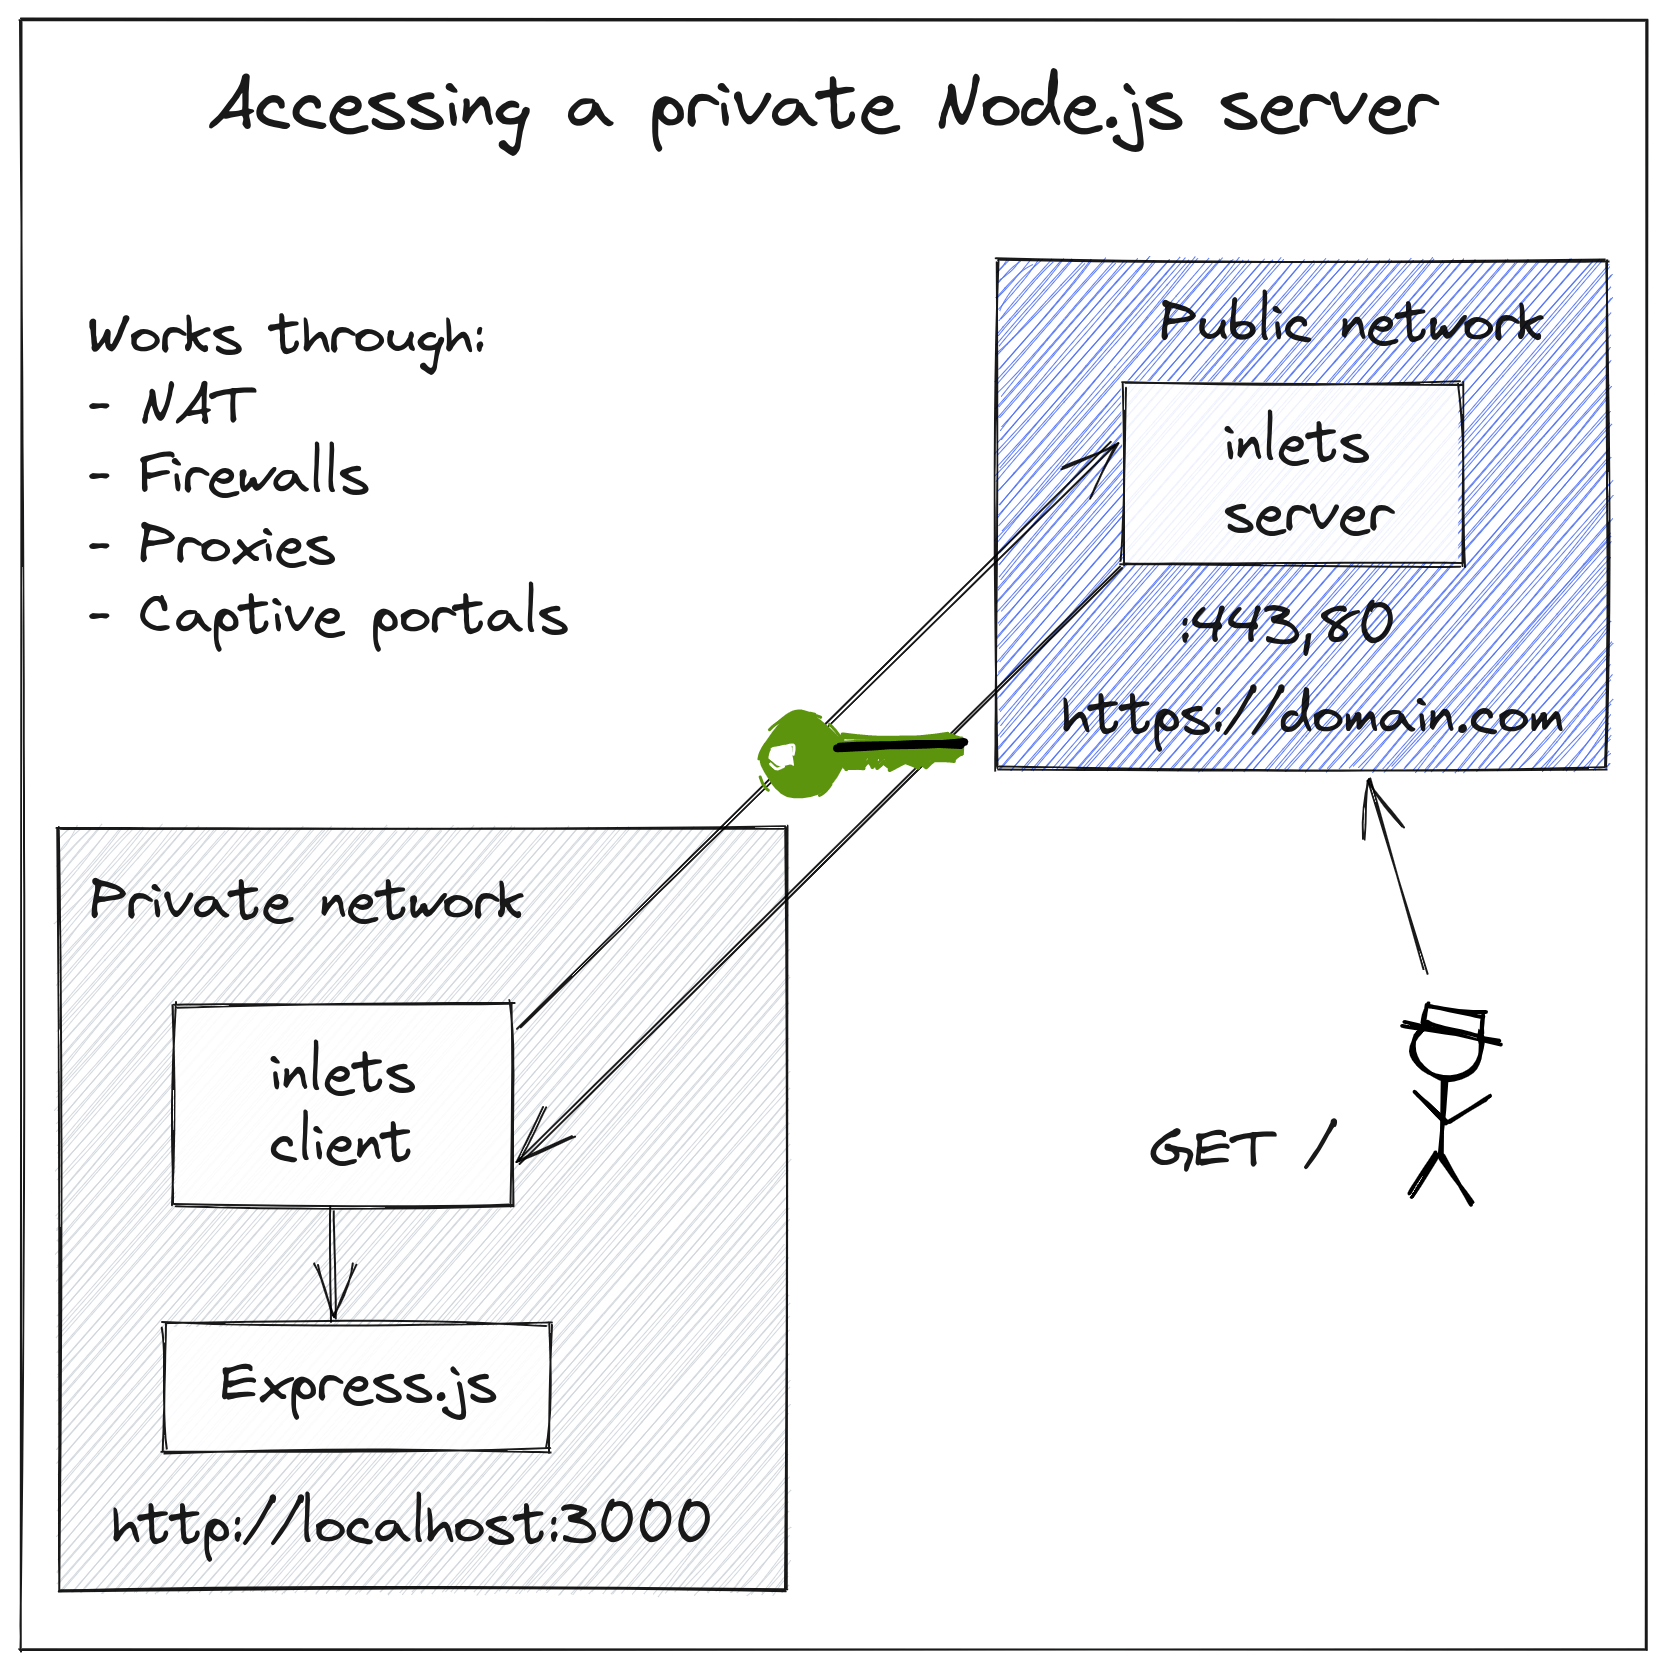
Inlets conceptual architecture - making localhost:3000 available via HTTPS with a public DNS record and custom domain.
In the diagram, the user wants to expose localhost:3000 to the Internet via DNS entry site.com, but we'll be using the RPi not to host services, just to act as a gateway. We'll be forwarding services running on our LAN.
The Raspberry Pi will run the inlets-pro http client software and decide what services to proxy where. It is the gateway.
For the exit-server we'll provision a host on public cloud, such as DigitalOcean. This host will provide a public IP and will run inlets server. Our RPi will connect to it.
Our hostname is now inlets-gw1, so use that to connect.
ssh pi@inlets-gw1.local
Get inletsctl which can create inlets exit-servers and download the inlets client/server binary.
curl -sSLf https://inletsctl.inlets.dev/ | sudo sh
Get the inlets-pro command:
sudo inletsctl download

# Check it worked

inlets-pro version
 _       _      _            _
(_)_ __ | | ___| |_ ___   __| | _____   __
| | '_ \| |/ _ \ __/ __| / _` |/ _ \ \ / /
| | | | | |  __/ |_\__ \| (_| |  __/\ V /
|_|_| |_|_|\___|\__|___(_)__,_|\___| \_/

  PRO edition
Version: 0.9.1 - 99e1785a9599ba43e149edc748c47319a325f9c9
Create an exit server
If you're a DigitalOcean or AWS customer, then sign up for an API key in your dashboard. Let's say you're using DigitalOcean, save the file on the local filesystem.
We'll use gitea.example.com as our custom domain.
Feel free to use this referral link to grab a few credits.
inletsctl create \
 --provider digitalocean \
 --access-token-file $HOME/do-access-token \
 --region lon1 \
 --letsencrypt-email webmaster@example.com \
 --letsencrypt-domain gitea.example.com
I live close to London, so I'm opting for a server with low-latency in the lon1 region.
You can explore the other options available via inletsctl create --help
After about 20-30 seconds inletsctl will print out the inlets client connection string, auth token and the public IP you can use for the public-facing side.
Using provider: digitalocean
Requesting host: trusting-elion6 in lon1, from digitalocean
2022/03/05 18:16:14 Provisioning host with DigitalOcean
Host: 289412298, status:
[1/500] Host: 176033357, status: new
[2/500] Host: 176033357, status: new
...
[14/500] Host: 289412298, status: active
The final output is when the host is up and running with inlets server started and running with systemd.
inlets Pro HTTPS (0.8.8) server summary:
  IP: 159.65.58.75
  HTTPS Domains: [gitea.example.com]
  Auth-token: iT0lHqrlRiSuhBYR9g783FGUKdABdVTM8IyBpaVgbOmGhAyJtHA8mF8gbAkNod92

Command:

# Obtain a license at https://inlets.dev
# Store it at $HOME/.inlets/LICENSE or use --help for more options

# Where to route traffic from the inlets server
export UPSTREAM="http://127.0.0.1:8000"
export TOKEN=iT0lHqrlRiSuhBYR9g783FGUKdABdVTM8IyBpaVgbOmGhAyJtHA8mF8gbAkNod92

inlets-pro http client --url "wss://159.65.58.75:8123" \
  --token "$TOKEN" \
  --upstream $UPSTREAM
Now you need to decide what you want services you want to proxy to the Internet.
Take note of the deletion command, which you can use to delete the exit-server later. The cost is around 5 USD / mo, which is pretty low for a public IP and compute. You can also delete the server in your dashboard if you lose the string.
Start a service in your network, which you want to expose
I'll start you off with my idea, but you can choose anything you want providing it works over HTTP/HTTPS. For pure TCP traffic, you can do exactly the same steps, but use inlets-pro instead.
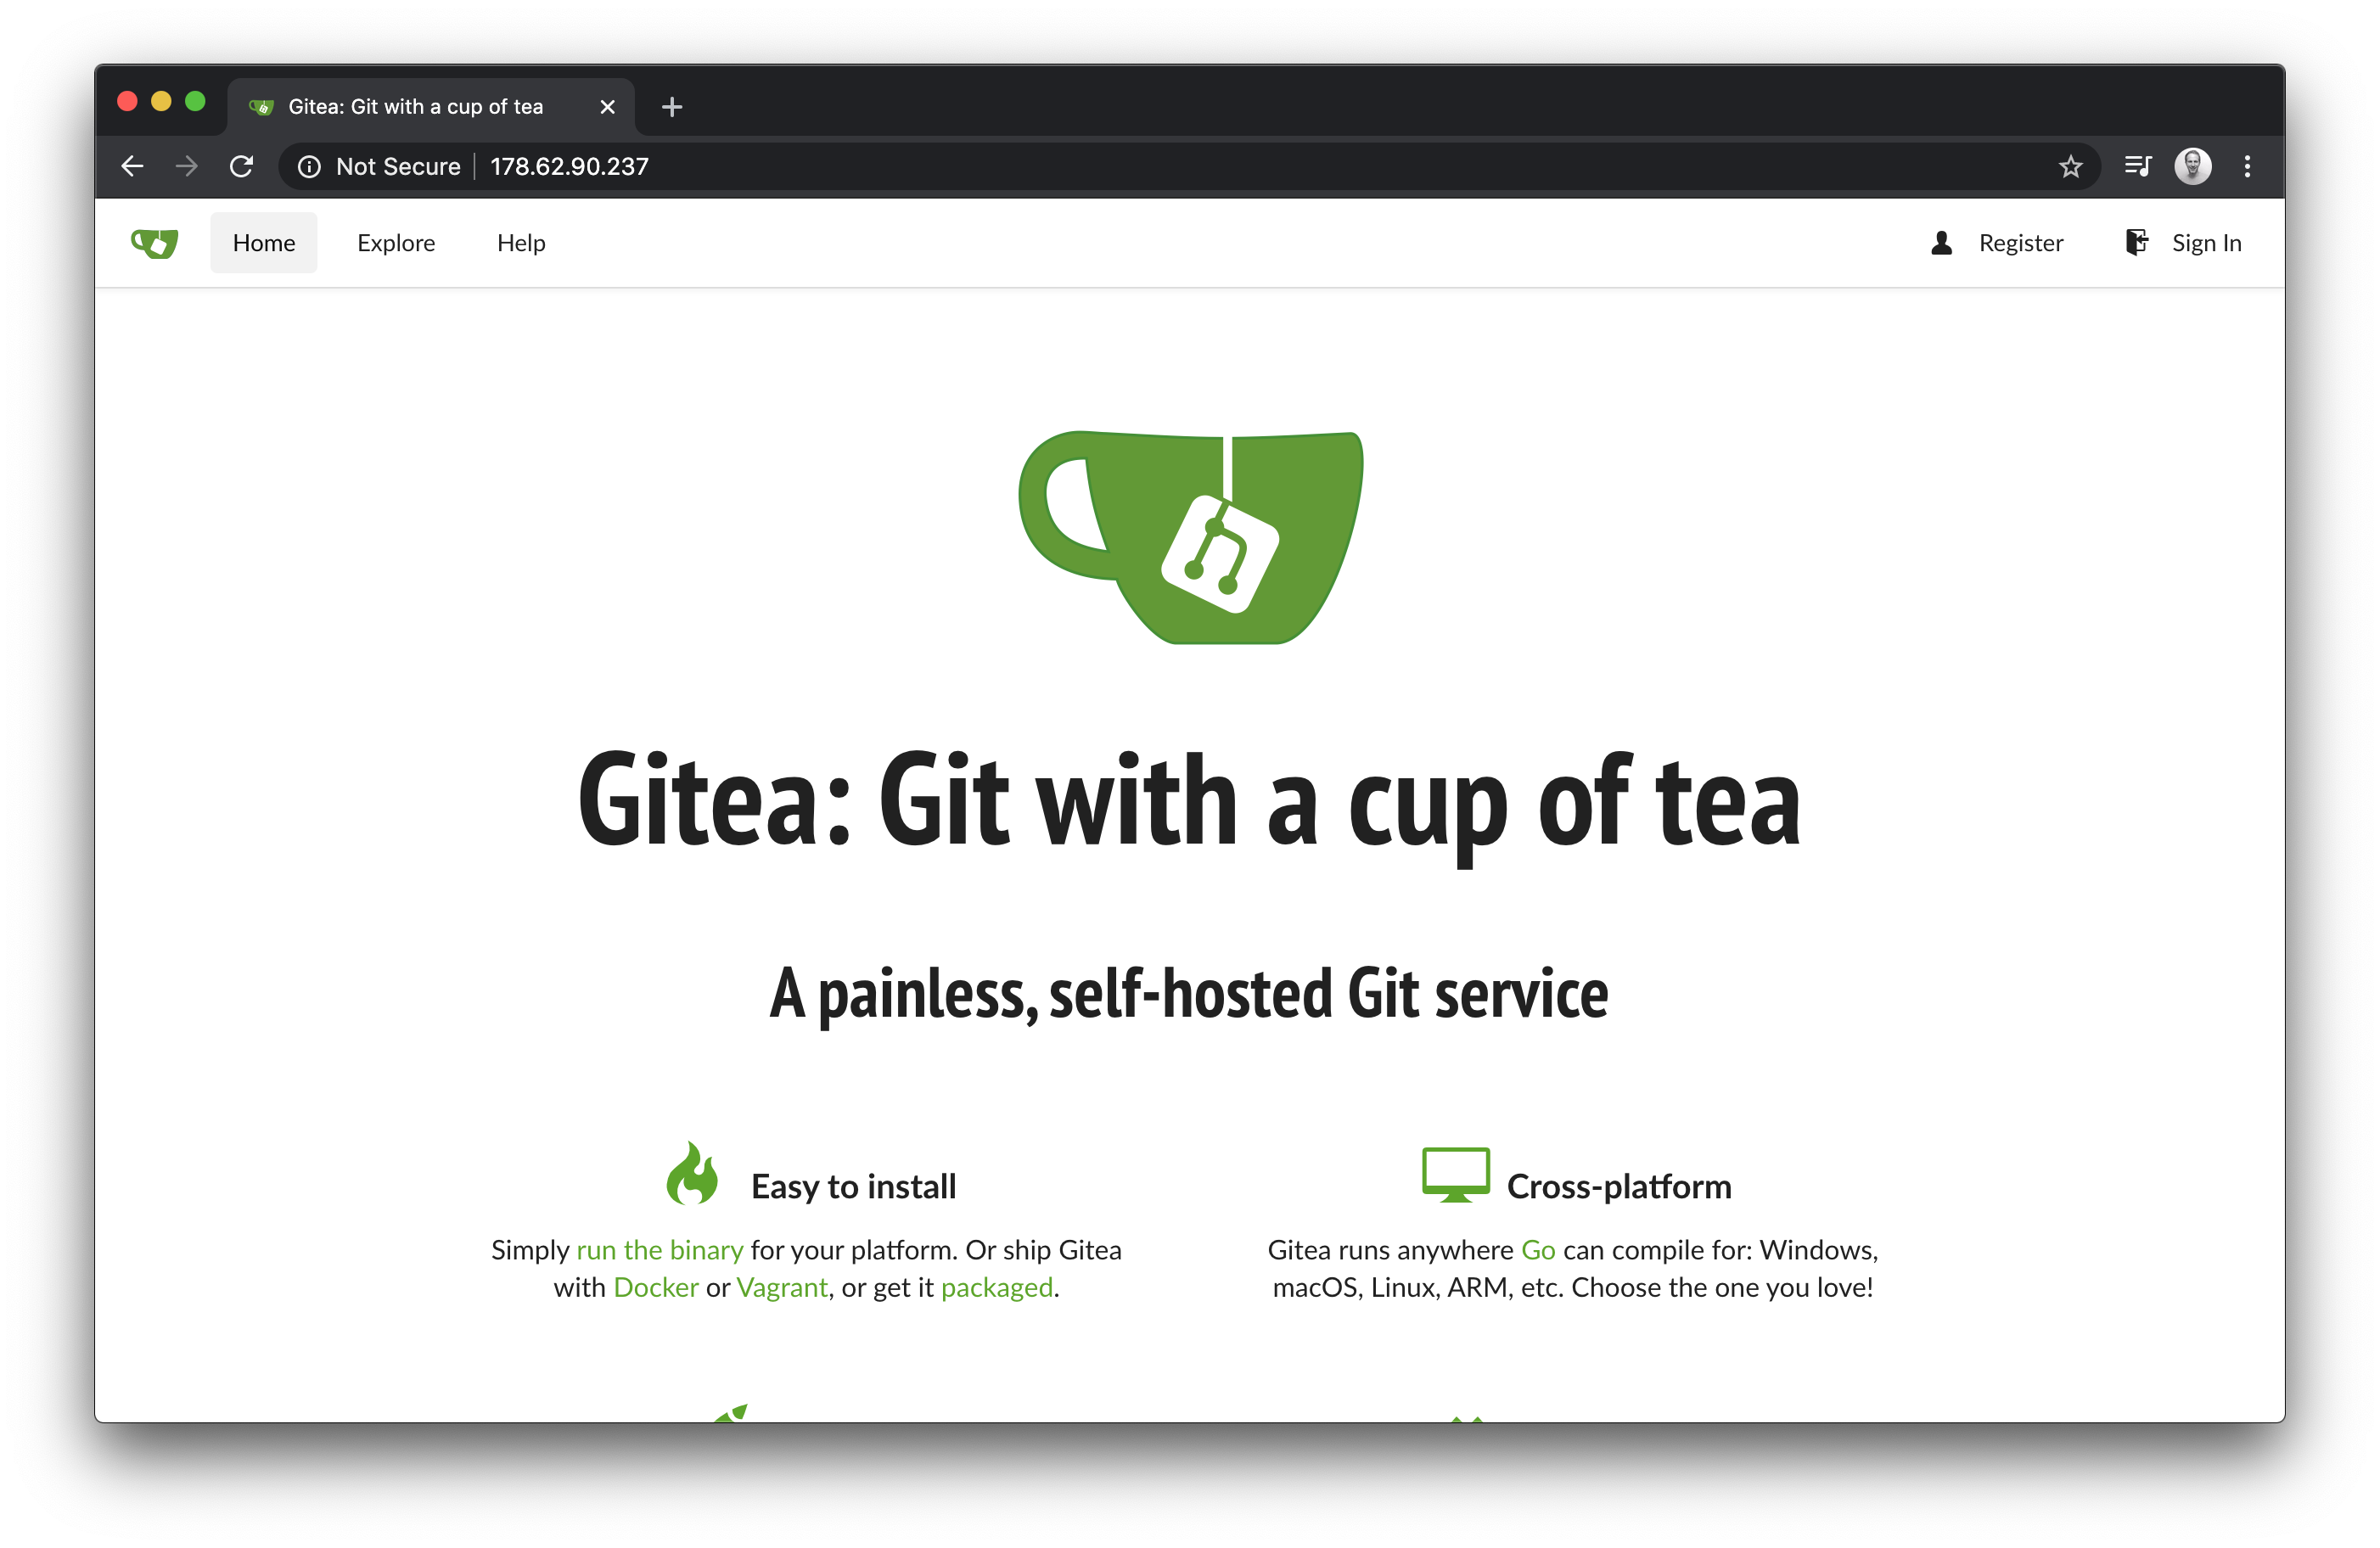
On my Mac with IP 192.168.0.14 I decided to run Gitea, which is a lightweight GitHub replacement. You can use it to store your side-projects and to collaborate with friends.
I downloaded the binary, and then ran it. It looks like it exposes port 3000 for its UI.
wget https://dl.gitea.io/gitea/1.9.6/gitea-1.9.6-darwin-10.6-amd64
chmod +x gitea-1.9.6-darwin-10.6-amd64
./gitea-1.9.6-darwin-10.6-amd64

2020/01/17 15:52:42 ...dules/setting/log.go:226:newLogService() [I] Gitea v1.9.6 built with GNU Make 4.1, go1.12.13 : bindata, sqlite, sqlite_unlock_notify
2020/01/17 15:52:42 cmd/web.go:151:runWeb() [I] Listen: http://0.0.0.0:3000
2020/01/17 15:52:42 ...ce/gracehttp/http.go:142:Serve() [I] Serving [::]:3000 with pid 1652
Bring up the gateway
So now run command from earlier, but customise the UPSTREAM to patch port 3000 from Gitea, and change 127.0.0.1 to the IP of your machine on the LAN, i.e. 192.168.0.14.
export UPSTREAM=gitea.example.com=http://192.168.0.14:3000

export UPSTREAM="http://127.0.0.1:8000"
export TOKEN=iT0lHqrlRiSuhBYR9g783FGUKdABdVTM8IyBpaVgbOmGhAyJtHA8mF8gbAkNod92

inlets-pro http client --url "wss://159.65.58.75:8123" \
  --token "$TOKEN" \
  --upstream $UPSTREAM
Use the exit-server's IP to connect to Gitea.
https://159.65.58.75
We have now deployed an Internet gateway for 10 USD, which has a public IP address and can obtain as many as we like for the cost of running a tiny DigitalOcean droplet. If you really like things cheap, you can run on a GCE or EC2 VM within the free tier offered by the service provider.
The latest version of inlets has built-in TLS termination with free certificates from Let's Encrypt, so your traffic will be encrypted wherever you use Gitea from.
Tunnel multiple services with your gateway
inlets supports multiple services for a single exit-server and client. You can specify each with a unique sub-domain or host header, for instance.
Let's imagine we're running gitea on one PC and then on a Raspberry Pi with IP 192.168.0.100 we're running a Node.js microservice running on port 3000.
--upstream gitea.example.com=http://192.168.0.14:3000 \
--upstream nodejs.example.com=http://192.168.0.100:3000
Then, you'd just create two DNS A records pointing at the public IP for:
gitea.example.comnodejs.example.com
A domain name can be created for a few dollars at namecheap.com, and managed on DigitalOcean for free.
Make your gateway permanent with systemd
We can now make the inlets client command start on boot-up, in this way we make our gateway permanent. You can even take your gateway and plug it in on another network, in effect "roaming".
Generate a systemd unit file:
inlets-pro http client \
  --generate=systemd \
  --url ... \
  --token ... \
  --upstream ... > inlets-pro.service
Install the service:
sudo cp ./inlets-pro.service /lib/systemd/system/inlets-pro.service
sudo systemctl daemon-reload
sudo systemctl enable inlets
sudo systemctl start inlets
You can now rest assured that systemd will manage the inlets-pro http client process and restart it if there was a network interruption or a crash.
sudo systemctl status inlets

● inlets-pro.service - Inlets Client Service
   Loaded: loaded (/lib/systemd/system/inlets-pro.service; enabled; vendor preset: enabled)
   Active: active (running) since Fri 2020-01-17 16:08:02 GMT; 20s ago
 Main PID: 1047 (inlets)
   Memory: 1.1M
   CGroup: /system.slice/inlets-pro.service
           └─1047 /usr/local/bin/inlets-pro http client

Jan 17 16:08:02 inlets-gw1 systemd[1]: Started Inlets Pro Client Service.
Check that Gitea is still accessible.
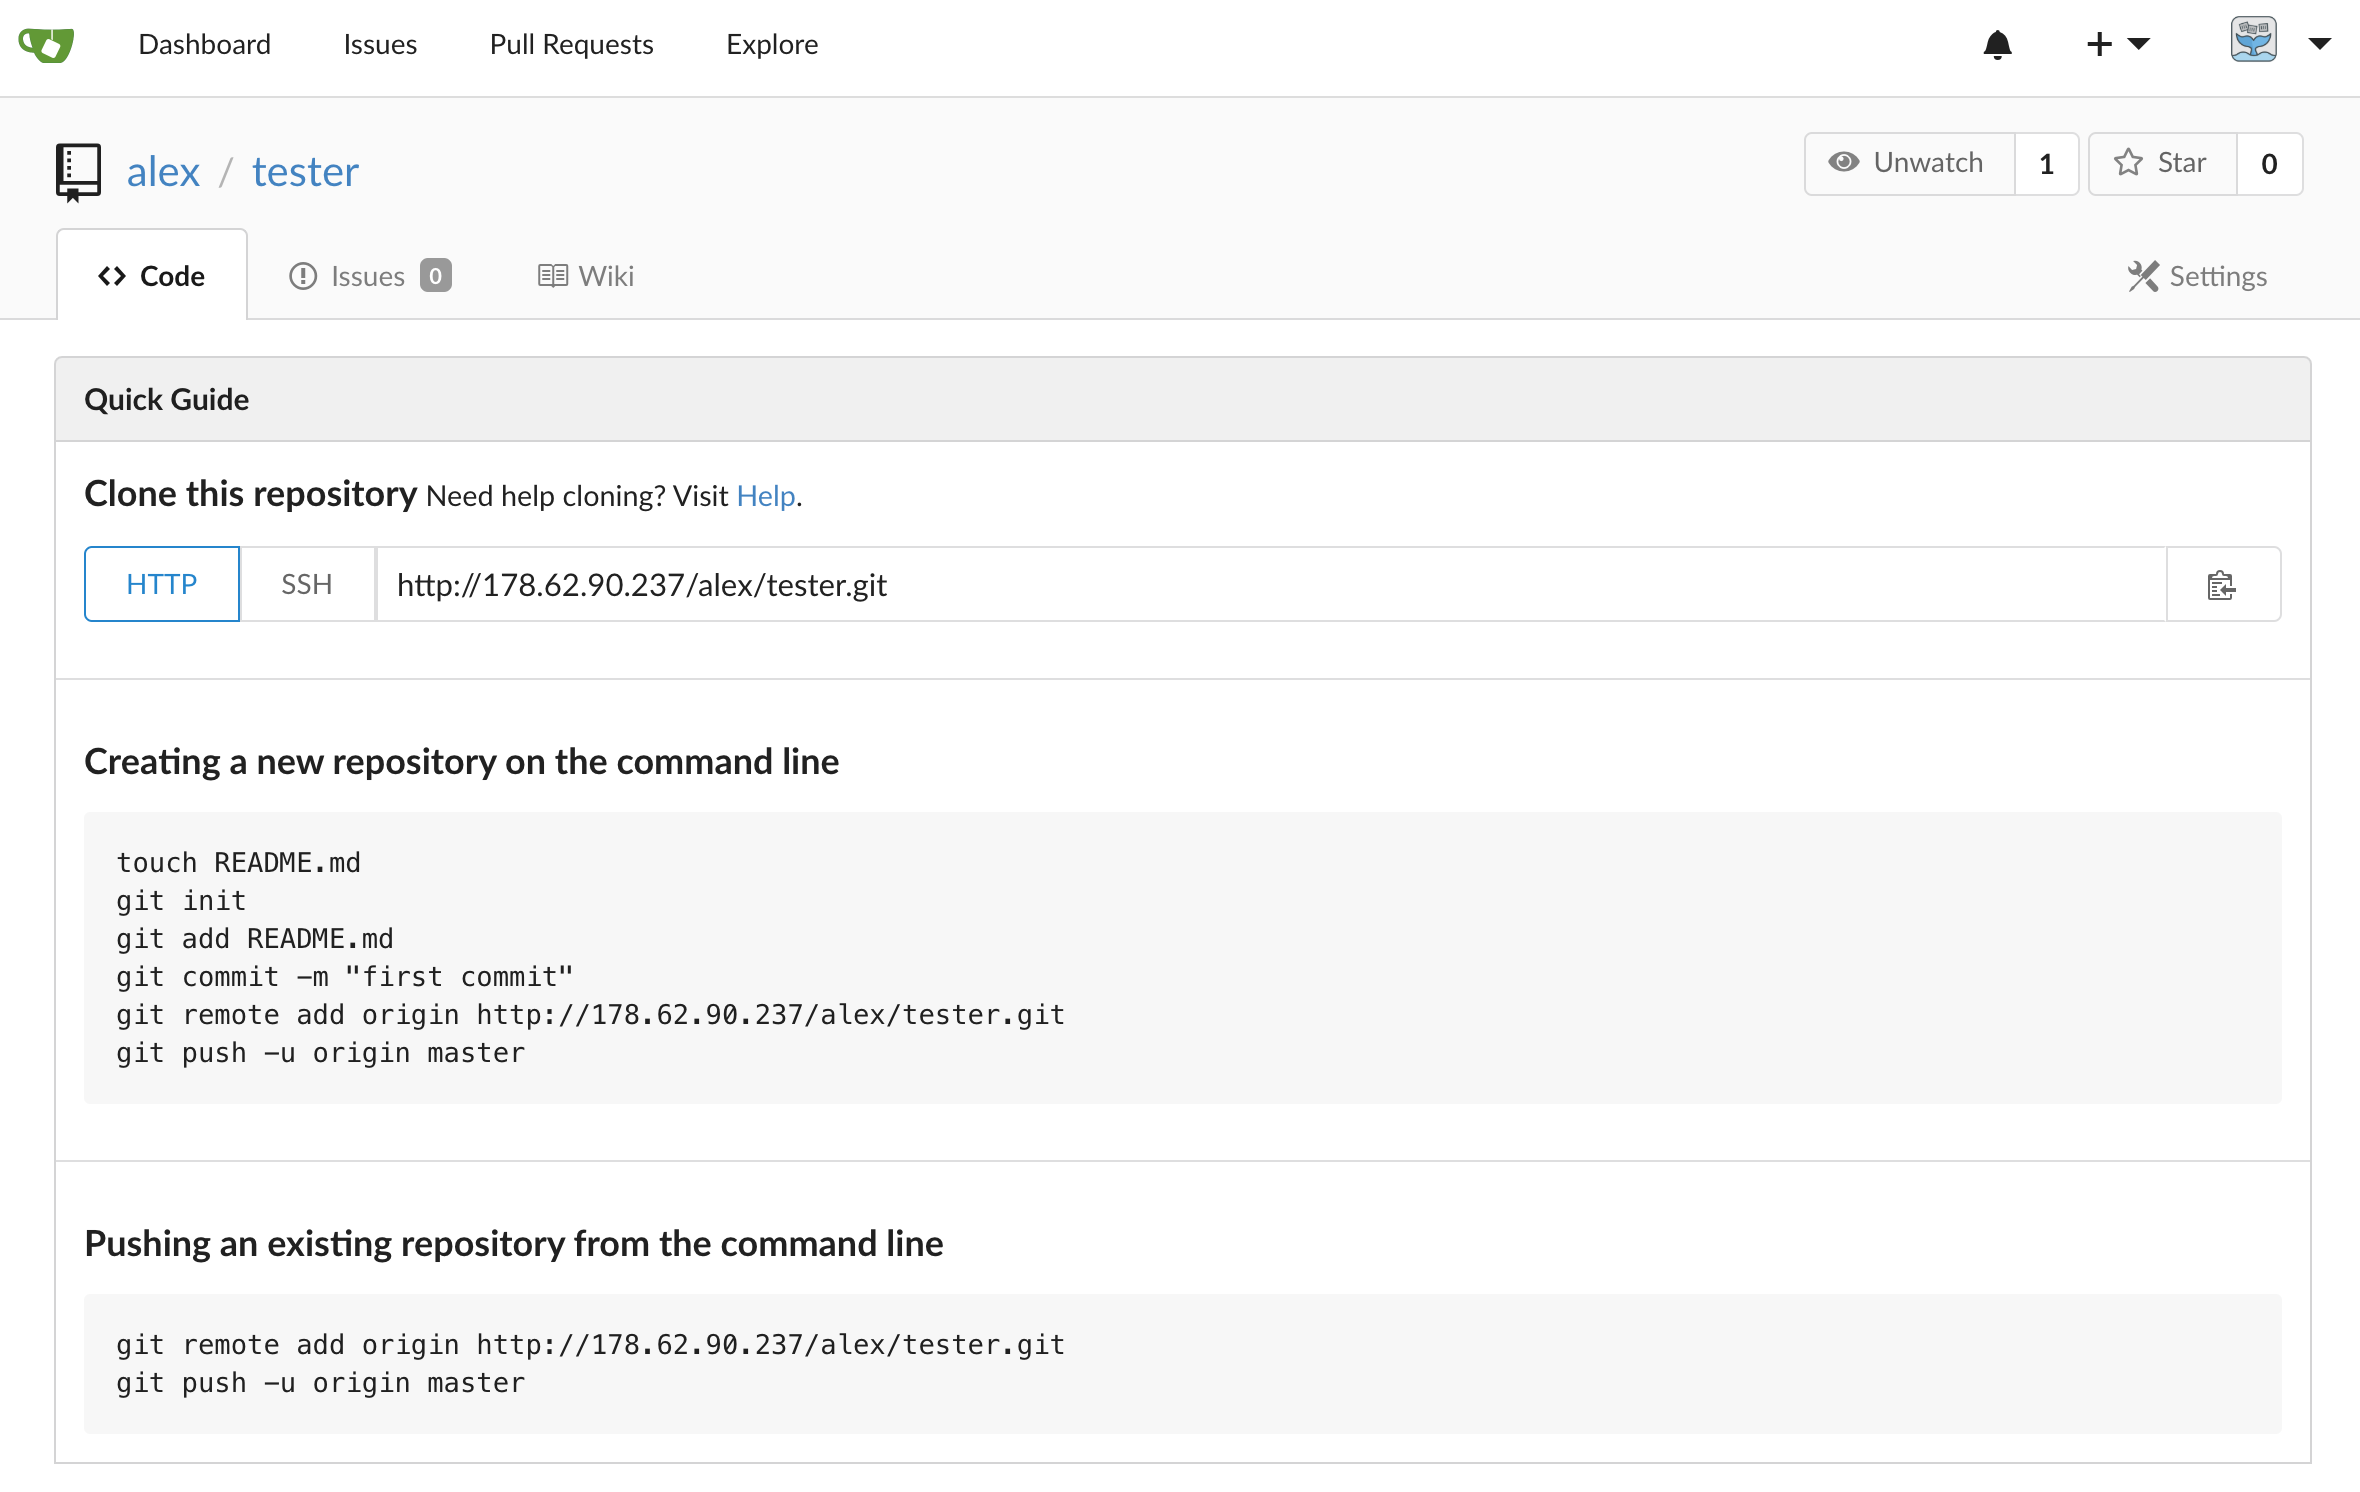
Gitea screenshot
I'm not a Gitea user, but you can edit /custom/conf/app.ini and update the root_url with your new IP, or a custom domain-name so that the URLs match in the dashboard.
I was able to clone the repo, add some content and then do a git push, but before we get carried away, read on.
Wrapping up
In a very short period of time, we were able to get up a secure Internet gateway on a 10 USD Raspberry Pi Zero W. Now you can expose any local HTTP website (such as Gitea) to the Internet.
You can also create a pure TCP gateway that will work for:
- SSH
- Kubernetes LoadBalancers
- MongoDB
- Postgres
- Remote desktop
..and anything else you can think of.
You can even bypass your gateway device completely, and run inlets or inlets PRO on your PC, laptop, home-lab, or on private cloud with packages and ports now available for Windows, Linux, MacOS, and FreeBSD.
What about Gitea or other services running inKubernetes?
inlets can also be used with Kubernetes and provides a LoadBalancer, for any TCP service you expose:
It took a while to get there, but now this is all it takes to get a LoadBalancer with a public IP address on any Kubernetes cluster. Whether that's public or private. Laptop or datacenter. Raspberry Pi or homelab.
— Alex Ellis (@alexellisuk) December 11, 2020
Put @inletsdev in your toolbox today: https://t.co/bS0mDEZTp1 pic.twitter.com/yBSlwp9N2Y
Connect and learn
- ⭐️ Star or fork inlets on GitHub
- Read inlets blog posts and tutorials
- Follow @inletsdev on Twitter