Share work with clients using inlets
Sharing work with clients, colleagues and team-members can be challenging for freelancers, for those who are travelling away from home, and for developers within a corporate network. I want to show you a quick way to get a free Cloud Native tunnel with inlets so that you can share work with clients and colleagues within seconds.
Tutorial
The example I want to use is a simple website written in Node.js, but you can use inlets to forward any kind of webpage, API, HTTP server. If you have a special TCP service like a database, you can also use inlets-pro for that.
Deploy a sample server
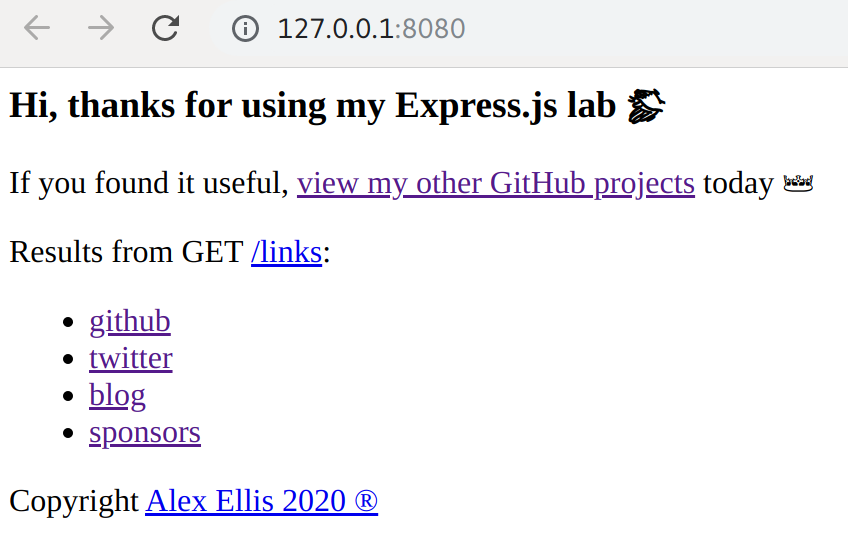
First of all we should start with a sample application, this could be anything, but I happen to have a Node.js example handy which uses the Express.js microservices framework.
If you don't have Node.js yet, you can install it here Node.js.
Now, clone the sample and run npm install to configure the packages required:
git clone https://github.com/alexellis/expressjs-k8s expressjs
cd expressjs

npm install
Now start the server:
npm start

> expressjs-docker@1.0.0 start /home/alex/expressjs
> node index.js

Express.js listening on port: 8080
Open the local version of the site at http://127.0.0.1:8080/
Get a cloud access token
You now need a cloud access token in order to create your exit-server.
As a DigitalOcean user, I do this via the dashboard under "API" and "Create new key". Most admin panels look similar to this, and will involve creating a single access token, or a pair with an access token and a separate secret key.
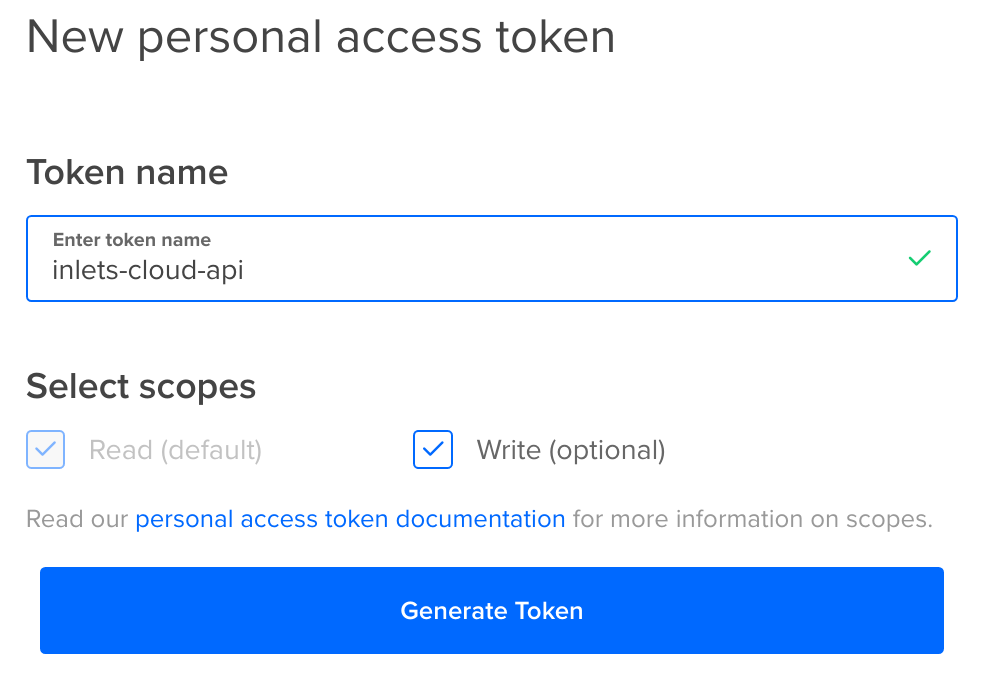
Save the key as $HOME/inlets-cloud-api
Note: to see a complete list of supported clouds just run
inletsctl create --help
Get inlets

inlets is a cloud native tunnel that offers a free reverse-proxy and tunnel that can traverse through NAT and firewalls to connect to a server (exit-server) on the Internet or another network with a public IP address.
For Windows users, you should install Git Bash or use WSL.
curl -sLSf https://inletsctl.inlets.dev | sudo sh

inletsctl download
Start the exit-server and establish the tunnel
The exit-server will cost us around 5 USD / mo, which is the cheapest plan on DigitalOcean. There are some ways to run inlets for free, if you don't mind setting things up yourself with Heroku or a similar free tier in AWS or GCP.
inletsctl create \
  --provider digitalocean \
  --region lon1 \
  --access-token-file $HOME/inlets-cloud-api
Once complete, you will be presented with a command you can type in to either establish the tunnel, or to delete the exit-server.
Using provider: digitalocean
Requesting host: awesome-wu2 in lon1, from digitalocean
2020/02/07 08:58:52 Provisioning host with DigitalOcean
Within a few moments you'll see the following printed out:
IP: 167.71.142.34
Auth-token: gZM13NsvmcahE7agc3j4jJQpQCPO9hlQM8HapkNnJagjUby1UDpKFd8sObVC0fhl

export UPSTREAM=http://127.0.0.1:8000
inlets client --remote "ws://167.71.142.34:8080" \
 --token "gZM13NsvmcahE7agc3j4jJQpQCPO9hlQM8HapkNnJagjUby1UDpKFd8sObVC0fhl" \
 --upstream $UPSTREAM

To Delete:
 inletsctl delete --provider digitalocean --id "179201868"
Our Node.js server is running on port 8080, so we need to customise the sample output. If you are running a Python Flask app, then you'd change that port to 5000 instead and so on.
export UPSTREAM=http://127.0.0.1:8080
inlets client --remote "ws://167.71.142.34:8080" \
 --token "gZM13NsvmcahE7agc3j4jJQpQCPO9hlQM8HapkNnJagjUby1UDpKFd8sObVC0fhl" \
 --upstream $UPSTREAM
The inlets tunnel will use port 80, so that your client or colleagues do not need to know what port you are using internally.
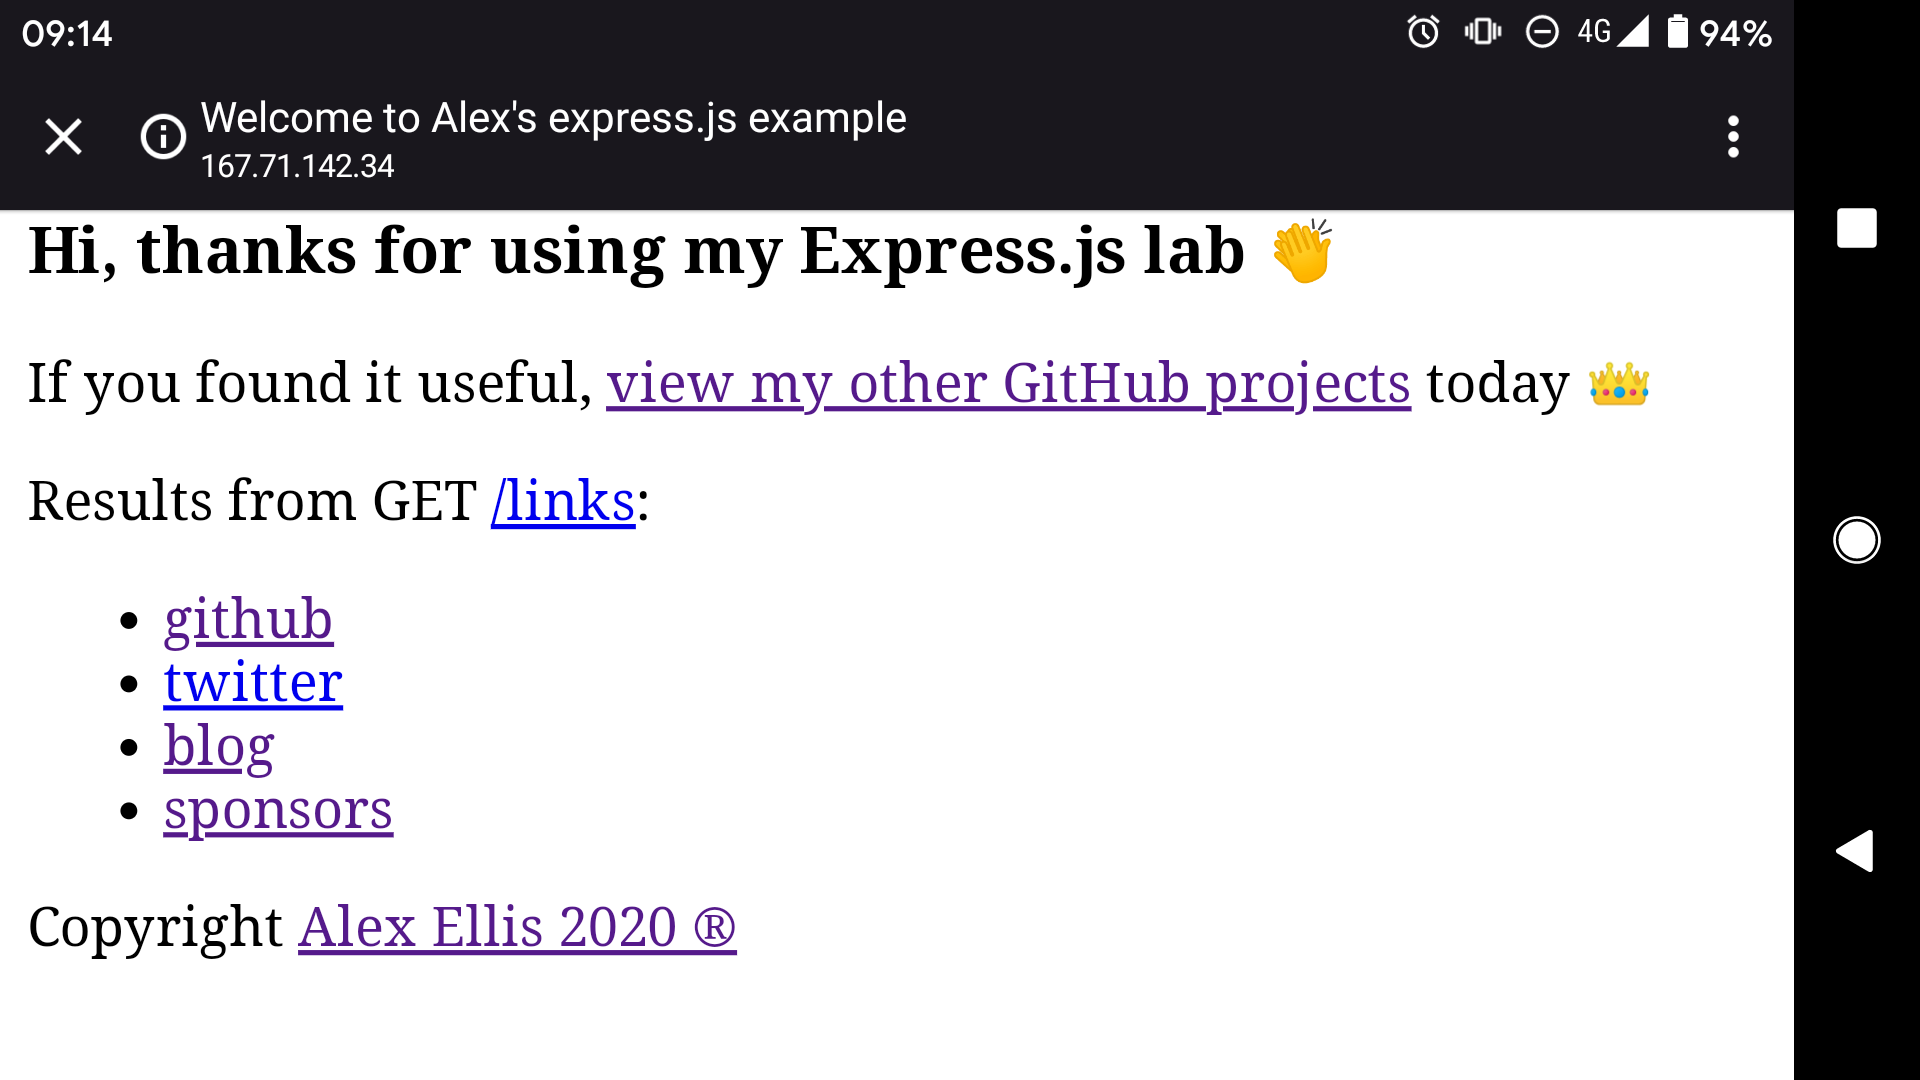
Check that you can access the sample app and share the public URL with a friend or colleague to check that they can access it. You can even access it from your mobile phone or tablet.
Here I accessed my site from my phone using 4G:
If you want to disconnect the tunnel, just hit Control + C, or exit inlets.
Create a custom domain
If you'd like to share a custom domain instead of an IP address, you can simply create a DNS record in your domain-name admin panel or dashboard.
Create an "A" record, then add the IP of the exit-server, for instance: client1.example.com and 167.71.142.34. Set the TTL to something low like 60 seconds or 1 min.
You can now share a custom domain: http://client.example.com
Delete the tunnel, or re-use it
If you'd like to remove the tunnel, simply run the command you were given inletsctl delete.
inletsctl delete --provider digitalocean --id "179201868" \
  --access-token-file $HOME/inlets-cloud-api

Using provider: digitalocean
Deleting host: 179201868 from digitalocean
You can also leave the exit-server running and simply reconnect to it whenever you like without running inletsctl create again.
Wrapping up
In a very short period of time we were able to set up an exit-server to share our work with a client or colleague using the free inlets OSS project. Its inletsctl CLI was able to provision a 5 USD server for us in a matter of moments, with full automation.
Find out more:
- View the project homepage for more tutorials
- Join Slack for community support
- Follow @inletsdev on Twitter and show your support for open-source
For hands-on technical support, feel free to email sales@openfaas.com, or book a call.