I planned a long weekend away with my wife at Centreparcs, a British chain of holiday retreats set in various woods around the country. You stay in a lodge or villa which is nestled within a forest where the local wildlife will often come right up to your doorstep. Compared with my inner-city garden it sounded like the perfect place to set up a timelapse camera with my Raspberry PI.
The setup
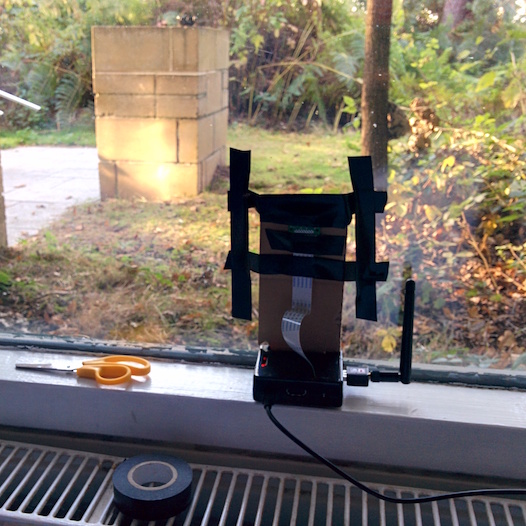
- Raspberry PI model A+ in a small black case
- RPI Camera 5MP and short cable
- Wi-Fi dongle and USB charger with a long flex
- Wide angle lens adapter
Part of the problem of using a Raspberry PI away from the home is that it's very hard to re-configure the Wi-Fi network without having a keyboard and screen. I get around this by having a hotspot on my phone which uses the same authentication as one of the hotspots in my home. Most phones will provide this feature. If your phone doesn't have this feature you can look into buying a cheap £10-15 portable hotspot or making the PI itself the hotspot (but I found this to be much more complicated in practice).
I plugged in and got the tape out. Unfortunately the wide-angle lens adapters do not come with any adapters or shims to fit onto the PI camera.. it means using cardboard or something more plush to make a surround. I did this then taped everything to the window and booted up.
Starting the time-lapse
I normally use a Mac or Linux laptop to connect to a PI but Windows works in a similar way. First I connect my laptop to the hotspot on my phone and check my ip address with ifconfig/ipconfig in this instance it gave me 192.168.43.x, I then feed this into a network scanning tool called nmap and run the following:
nmap -sP 192.168.43.0/24
It will now list off all the visible devices and once I find my PI I use ssh 192.168.43.x, I log in, take a few test shots - realign the camera and then run my application. If it is not available I can clone it from Github:
git clone https://github.com/alexellis/phototimer.gitcd phototimerpython2 take.py 60 &
Then you are free to log off and let it the image capture begin.
Taking it further
Create a video
You can browse the photos on disk - they will be organised and split into folders by: year/month/day/hour and no images will be taken before/after sunrise/set (this is configurable).
If you want to create a video there are command line utilities available but the easiest way would be to import the images into iMovie or Windows Movie Maker on a PC/laptop and let its processor do the grunt work.
If things don't go to plan
The first problem I had at the villa was finding a suitable power-socket and then positioning the camera where I wanted it. The adapter I did take made a hissing noise when plugged in to the wall by the bed so wasn't going to work for capturing the sunrise. I opted for a silent charger but it had a shorter flex restricting where I could place it. In the future I'd take a 5m extension reel along.
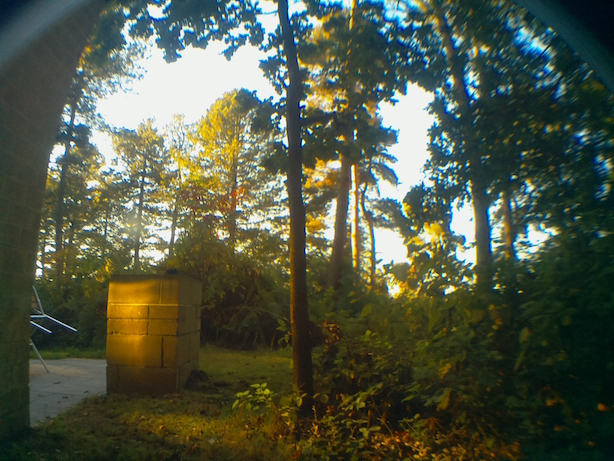
One of the first images from the PI. Shortly after this a large and colourful pheasant came into view and started to hunt for worms.
Unfortunately while trying to 'do things properly' I decided to install a utility like screen or nohup to make sure that my program would not stop executing when I logged out of the ssh session. Now since I was connected to the internet via a mobile phone connection I decided a fun system upgrade was out of the question so only updated the package list and added the 'screen' package.
Little was I to know that Arch Linux had a major breaking change in the ncurses library meaning they had completely removed version 5 in favour of version 6. I did a quick reboot and got no Wi-Fi connection and so had no way of opening a connection to start my program. I plugged the PI into the TV and saw lots of errors appearing in the boot-up sequence confirming the problem.
I had a back-up plan and had bought a serial to USB converter so that I could use the serial bus to log in and fix things up. But while I'd brought 4 different micro USB cables I didn't have a mini USB cable or a keyboard so had no way of logging in.
For me the lesson learnt is to always expect the PI to have a catastrophic failure and then be over-prepared to deal with it. Or in this case, just put it down to experience.
In order of easy/convenience:
- Carry a spare working image on an SD card
- Carry a USB-Serial adapter and (cable) and test before you leave the house
- Carry a keyboard and HDMI cable
- If you are using a PI with a hard network connection maybe take an ethernet cable with you too.
- A power cable much longer than you think you will need. Possibly an extension cable.
Let me know how you get on
If you have any questions or suggestions let me know in the comments and send in a link to your time-lapse video.