Attach USB storage to your Raspberry Pi
In this quick guide we'll show how to attach storage to your Raspberry Pi. It's likely that at some point you will need to plug in a USB hard drive or a USB pen-drive for extra storage, remote backups, for your Docker images or as part of a Network Attached Storage server.
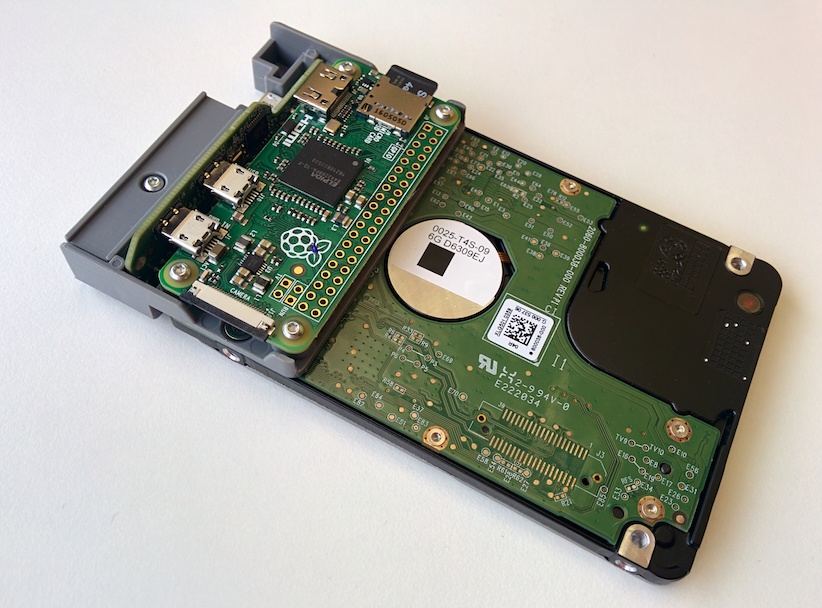 Pictured: WDLabs NodeZero with 314GB HDD
Pre-requisites
For most USB hard drives you will need a power supply (PSU) capable of supplying at least 2.5A @ 5V, for some drives you may need even more power than this. This may mean that your setup will need one PSU for the Raspberry Pi and an additional one per hard drive you add.
In general - adding USB pen-drives will not consume noticeably more power.
The PiDrive from WDLabs comes with splitter cable allowing a Pi and a HDD to be powered at the same time.
Good defaults
The best option for most people will be to use the default settings Raspbian - the official Operating System from the Raspberry Pi Foundation. So we will be formatting our drive with the EXT4 filesystem and using a unique label so that we can use multiple devices at the same time.
Warning
Proceed only if you are comfortable working with the command line and have a backup of your data.
Step 1. Identify the drive
The easiest way to identify your drive is to only plug one in at a time. The Linux command lsblk will list all bulk storage devices.
Whatever you do avoid making changes to the drive named
mmcblk0because this is your SD card.
I am working on a WDLabs NodeZero device which is a Pi Zero and 314GB HDD combined into single unit.
pi@nodezero:~ $ lsblk
NAME        MAJ:MIN RM   SIZE RO TYPE MOUNTPOINT
sda           8:0    0 292.5G  0 disk
└─sda1        8:1    0 292.5G  0 part
mmcblk0     179:0    0   3.7G  0 disk
├─mmcblk0p1 179:1    0    63M  0 part /boot
└─mmcblk0p2 179:2    0   3.6G  0 part /
We can see the device or drive has the name sda - if you were to plug additional drives they would get the names sdb, sdc, sdd and so forth.
Step 2. Create the partitions
We will now use the fdisk tool to wipe out the existing partitions and create new ones. This is not always essential but ensures we have a known state on the disk.
sudo fdisk /dev/sda
First wipe the existing partitions:
Command (m for help): o
Created a new DOS disklabel with disk identifier 0x7508d343.
Now create a single partition by accepting all the defaults (hit enter for each question):
Command (m for help): n
Partition type
   p   primary (0 primary, 0 extended, 4 free)
   e   extended (container for logical partitions)
Select (default p):

Using default response p.
Partition number (1-4, default 1):
First sector (2048-613355519, default 2048):
Last sector, +sectors or +size{K,M,G,T,P} (2048-613355519, default 613355519):

Created a new partition 1 of type 'Linux' and of size 292.5 GiB.

Command (m for help):
Finally write the changes:
Command (m for help): w
The partition table has been altered.
Calling ioctl() to re-read partition table.
Syncing disks.

pi@nodezero:~ $
Step 3. Format the new partition
You can check that the new partition was created by typing in:
pi@nodezero:~ $ sudo fdisk -l /dev/sda

Disk /dev/sda: 292.5 GiB, 314038026240 bytes, 613355520 sectors
Units: sectors of 1 * 512 = 512 bytes
Sector size (logical/physical): 512 bytes / 512 bytes
I/O size (minimum/optimal): 512 bytes / 512 bytes
Disklabel type: dos
Disk identifier: 0x5e2f65e0

Device     Boot Start       End   Sectors   Size Id Type
/dev/sda1        2048 613355519 613353472 292.5G 83 Linux
We'll now format the partition we just created and at the same time attach a unique label.
$ sudo mkfs.ext4 -L PIDRIVE1 /dev/sda1
If you get a message such as
/dev/sda1 contains a ext4 file system - Proceed anyway? (y,n)- type iny.
Step 4. Pick a mount-point
For a Linux operating system we need to pick a directory to mount our storage under. This could be almost any folder including /home/pi for instance. We'll keep things simple and pick /mnt/pidrive1.
$ sudo mkdir /mnt/pidrive1
Let's test the mount point temporarily and then make things permanent.
pi@nodezero:~ $ sudo mount -L PIDRIVE1 /mnt/pidrive1
pi@nodezero:~ $ ls /mnt/pidrive1/
lost+found
Now we were able to mount our drive using a label instead of the device / drive name of /dev/sda1 - as long as we keep the labels unique for all devices we attach we can use this method to identify them.
Step 5. Make it permanent
If you intend on using the drive permanently then follow this step. The next step involves editing the fstab file which is used to mount disks at system boot time:
sudo nano /etc/fstab
Since we used an ext4 file-system and that is also used for the SD card's root filesystem, we can use the same settings. You should see two lines like the following:
proc            /proc           proc    defaults          0       0
/dev/mmcblk0p1  /boot           vfat    defaults          0       2
/dev/mmcblk0p2  /               ext4    defaults,noatime  0       1
Add a line underneath, save the file, then reboot:
LABEL=PIDRIVE1 /mnt/pidrive1 ext4 defaults,noatime 0 1
Now that your drive is attached let's look at how to keep the drive working reliably and a few uses for that extra storage.
Best practices
-
Always shutdown with
shutdown -h 0orhalt -h- never pull the power cable. -
If you are using the drive only temporarily then type in
sudo umount /mnt/pidrive1before pulling out the USB cable - or shutdown the system first. -
If you have a power-cut or accidental power-out then you can repair the filesystem like this:
$ sudo umount /mnt/pidrive1
$ sudo fsck /dev/sda1

fsck from util-linux 2.25.2
e2fsck 1.42.12 (29-Aug-2014)
PIDRIVE1: clean, 11/19169280 files, 1251934/76669184 blocks
- Optimizing power consumption
The cheapest drives to run are 2.5" laptop-sized disks. A full-sized desktop disk can be used with a caddy or adapter but will likely need its own 12v or 24v PSU and will be noisy in comparison.
Projects and uses
At this point you can start making use of your new expanded storage. Here are a few ideas:
-
Learn how to use Docker on the Raspberry Pi
If you have questions or comments - please get in touch on Twitter and follow @alexellisuk for all the latest blogs and guides.
Share this post on Twitter:
Attach USB storage to your Raspberry Pi 💾 - #tutorial #devops #linux @Raspberry_Pi https://t.co/1zP6rqA5gB pic.twitter.com/yoXnPzExMk
— Alex Ellis (@alexellisuk) May 29, 2017