3 Steps to MSBuild with Docker
In three steps we will get MSBuild in a Docker container and have it build an ASP.NET WebAPI application from a previous post with Windows Containers. Here's two of the applications we've seen already:
-
Guid Generator microservice - ASP.NET WebAPI application
-
Docker voting app - MSSQL Server connected to an ASP.NET WebAPI application
In both examples we built the code manually in Visual Studio before building the Docker images and running the containers. This is OK for our "dev" environment - but when we move to a Continuous Integration (CI) system we need something headless and automated.
Let's build out a generic example for the Guid Generator microservice.
It will look like this when we're done.
Step 1 - MSBuild in a Docker container
Having not found an official MSBuild container I put one together based upon the Windows Server Core edition. It also adds NuGet for the essential "package restore".
I have pushed the image up to the Docker hub and provided the source below:
Docker image: alexellisio/msbuild:12.0
FROM microsoft/windowsservercore:10.0.14393.206
MAINTAINER alexellis2@gmail.com

# docker push alexellisio/msbuild:12.0

SHELL ["powershell"]

# Note: Get MSBuild 12.
RUN Invoke-WebRequest "https://download.microsoft.com/download/9/B/B/9BB1309E-1A8F-4A47-A6C5-ECF76672A3B3/BuildTools_Full.exe" -OutFile "$env:TEMP\BuildTools_Full.exe" -UseBasicParsing
RUN &  "$env:TEMP\BuildTools_Full.exe" /Silent /Full
# Todo: delete the BuildTools_Full.exe file in this layer

# Note: Add .NET + ASP.NET
RUN Install-WindowsFeature NET-Framework-45-ASPNET ; \
    Install-WindowsFeature Web-Asp-Net45

# Note: Add NuGet
RUN Invoke-WebRequest "https://dist.nuget.org/win-x86-commandline/latest/nuget.exe" -OutFile "C:\windows\nuget.exe" -UseBasicParsing
WORKDIR "C:\Program Files (x86)\MSBuild\Microsoft\VisualStudio\v12.0"

# Note: Install Web Targets
RUN &  "C:\windows\nuget.exe" Install MSBuild.Microsoft.VisualStudio.Web.targets -Version 12.0.4
RUN mv 'C:\Program Files (x86)\MSBuild\Microsoft\VisualStudio\v12.0\MSBuild.Microsoft.VisualStudio.Web.targets.12.0.4\tools\VSToolsPath\*' 'C:\Program Files (x86)\MSBuild\Microsoft\VisualStudio\v12.0\'
# Note: Add Msbuild to path
RUN setx PATH '%PATH%;C:\\Program Files (x86)\\MSBuild\\12.0\\Bin\\msbuild.exe'
CMD ["C:\\Program Files (x86)\\MSBuild\\12.0\\Bin\\msbuild.exe"]
Fork on Github: msbuild/Dockerfile
Step 2 - Add your solution
Now create a custom Dockerfile which pulls in the MSBuild base image, adds your solution directory and invokes NuGet/MSBuild.exe.
FROM alexellisio/msbuild:12.0
SHELL ["powershell"]
COPY . 'C:\\build\\'
WORKDIR 'C:\\build\\'
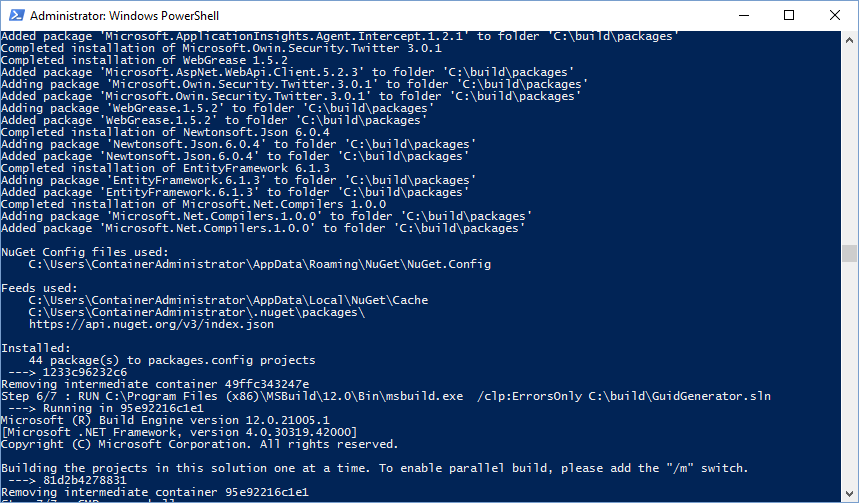
RUN ["nuget.exe", "restore"]
RUN ["C:\\Program Files (x86)\\MSBuild\\12.0\\Bin\\msbuild.exe", "C:\\build\\GuidGenerator.sln"]
## Usage: build image, then create container and copy out the bin directory.
CMD ["powershell"]
Fork on Github: build.Dockerfile
So this container / image has a single purpose - to build binaries and nothing else. The most important line is below:
RUN ["C:\\Program Files (x86)\\MSBuild\\12.0\\Bin\\msbuild.exe", "C:\\build\\GuidGenerator.sln"]
At this point you've built the binaries, now you can extract them like this:
docker build -f build.Dockerfile -t guid-generator-assets .

docker create --name guid-generator-assets-1 guid-generator-assets

docker cp guid-generator-assets-1:C:\\build\\GuidGenerator\\bin .\\GuidGenerator\bin
You will notice we create a container but never start it, this is because we created binaries at build-time and want to copy them out to the local disk for use in an IIS (webserver) container.
Step 3 - Over to IIS
Now we've copied out the binaries from MSBuild we can build a new image with IIS and drop everything inside.
FROM microsoft/iis:10.0.14393.206
SHELL ["powershell"]

RUN Install-WindowsFeature NET-Framework-45-ASPNET ; \
    Install-WindowsFeature Web-Asp-Net45

COPY GuidGenerator GuidGenerator
RUN Remove-WebSite -Name 'Default Web Site'
RUN New-Website -Name 'guidgenerator' -Port 80 \
    -PhysicalPath 'c:\GuidGenerator' -ApplicationPool '.NET v4.5'
EXPOSE 80

CMD Write-Host IIS Started... ; \
    while ($true) { Start-Sleep -Seconds 3600 }
If you saw the original article then you may notice that this runtime Dockerfile did not need to change. We just replaced the original manual compilation with Visual Studio with an automated one in a container.
If you want to automate everything you can create a PowerShell script like this:
Remove-Item GuidGenerator\\bin -Recurse
docker build -f build.Dockerfile -t guid-generator-assets .

docker create --name guid-generator-assets-1 guid-generator-assets

docker cp guid-generator-assets-1:C:\\build\\GuidGenerator\\bin .\\GuidGenerator\bin

docker rm guid-generator-assets-1

docker build -f Dockerfile -t guid-generator:0.1 .
Fork it on Github build.ps1
Finally it's over to you to run the Guid Generator and browse to it or hit it with curl. Here's a video of the three steps:
Video walk-through
Final notes
In this tutorial we've made use of a builder pattern recommended by the Docker team which means we get a repeatable/trackable image for each build we run. We never have to issue a docker run command because all steps are carried out at build time through RUN directives.
An alternative would be to start a container and share a directory from the host temporarily to inject the source code and to retrieve the binaries. This is called bind mounting.
There are pros and cons to both methods and it's up to the individual or team to decide exactly how they will use MSBuild in a container.
I hope this work will provide a useful talking point or template for your journey into Windows Containers. Please get in touch @alexellisuk.